How to add filters to a custom page
You can further filter the existing charts or views by filters. Depending on the configured filter, you can filter the data that matches the criteria directly.
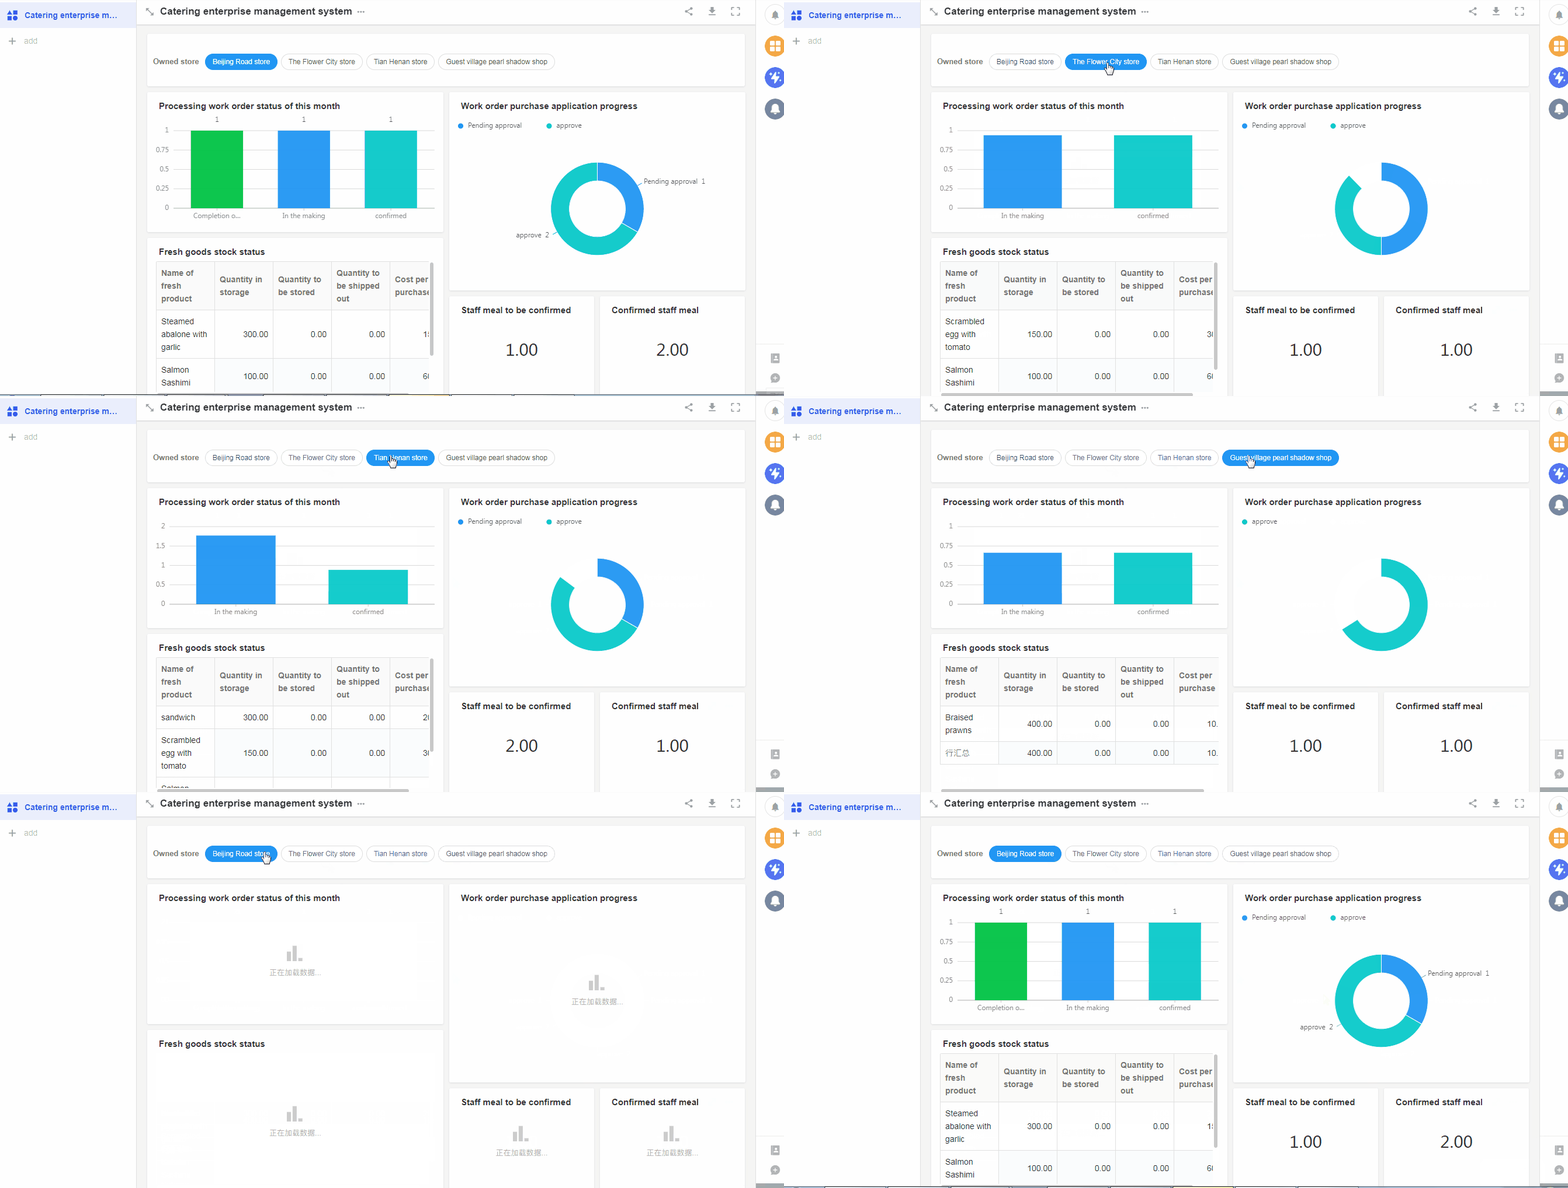
Configuration Steps
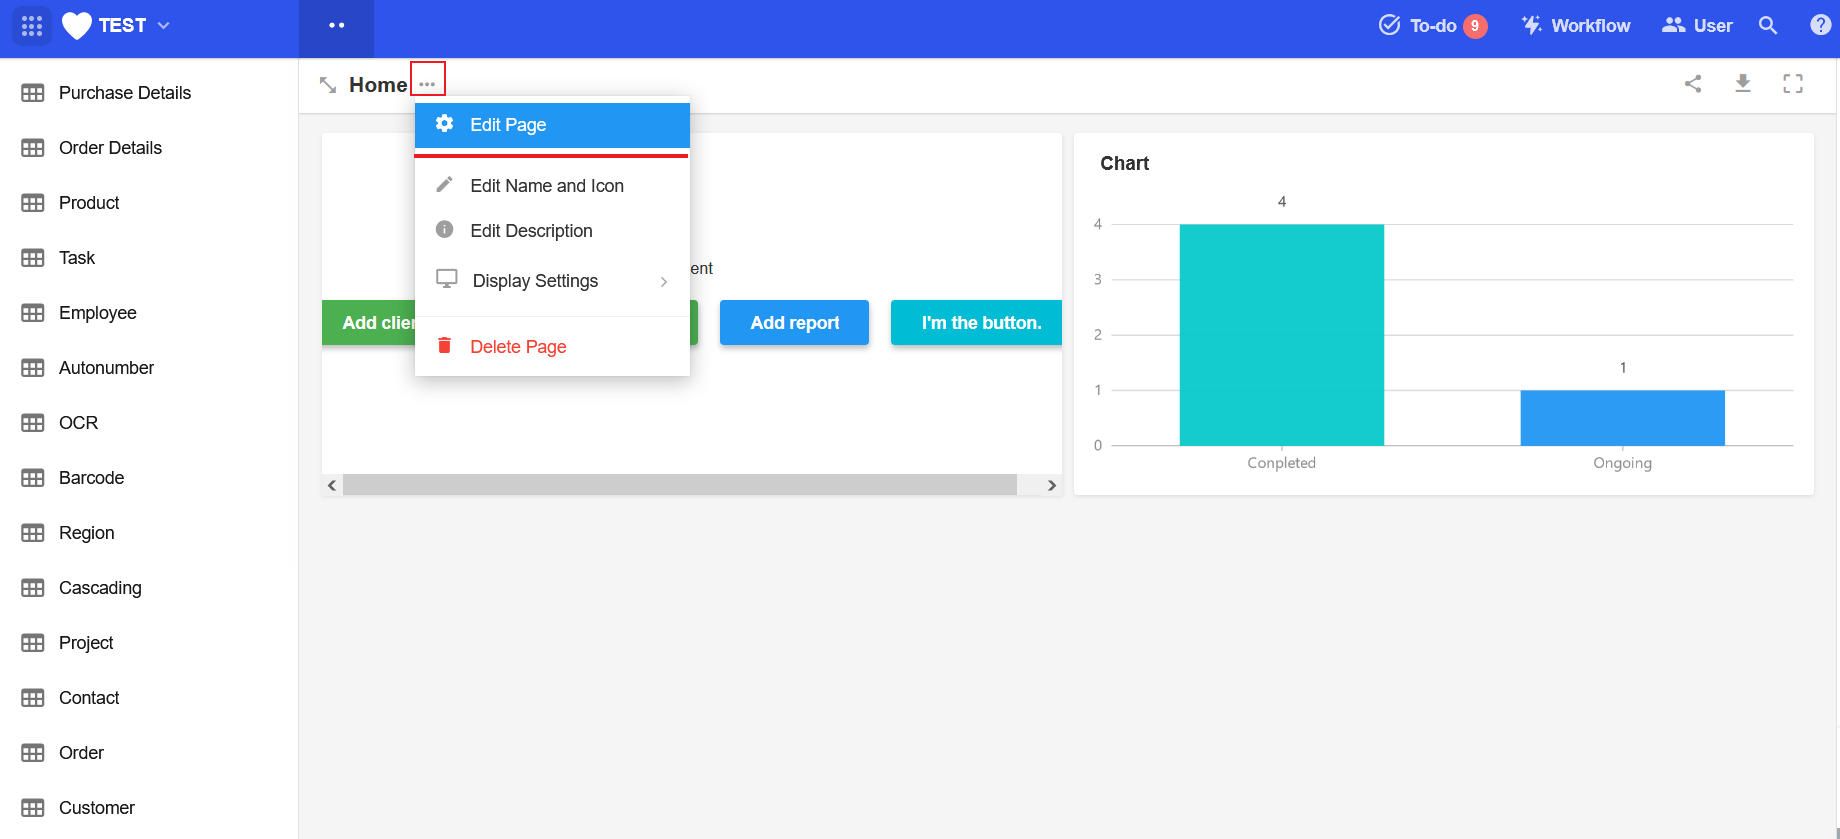
1. Enter the editing page of a custom page
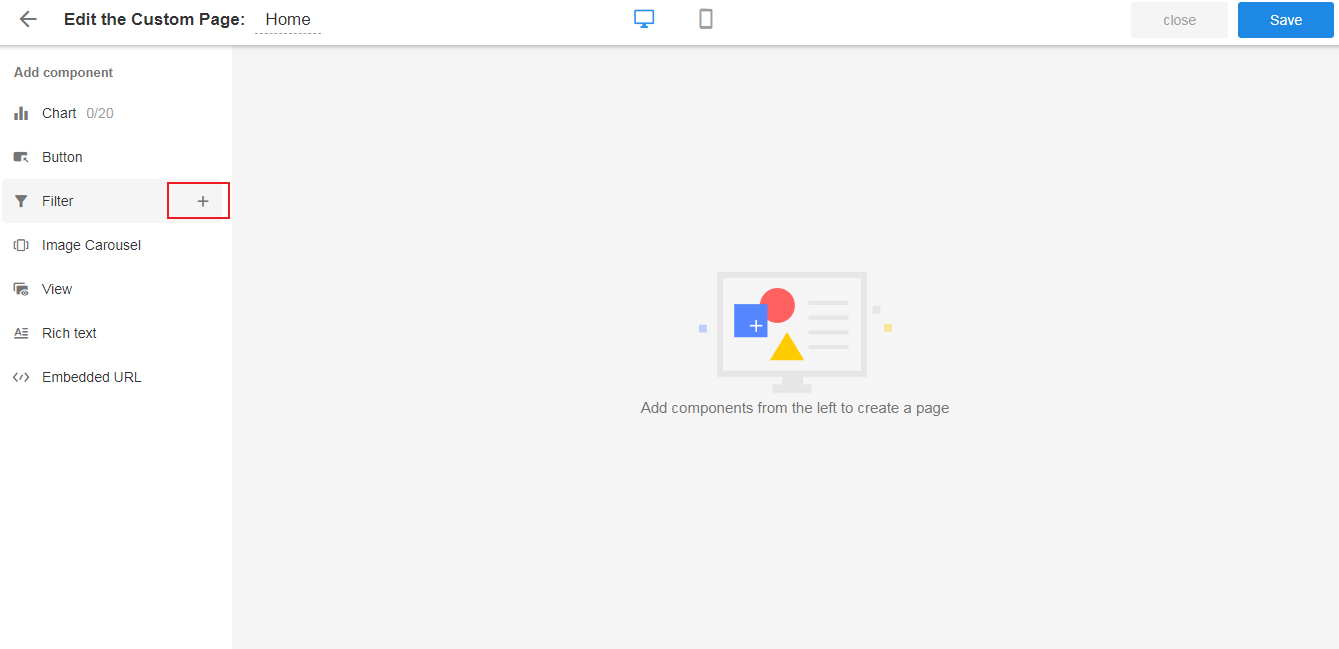
2. Add a filter
3. Select the target chart or view
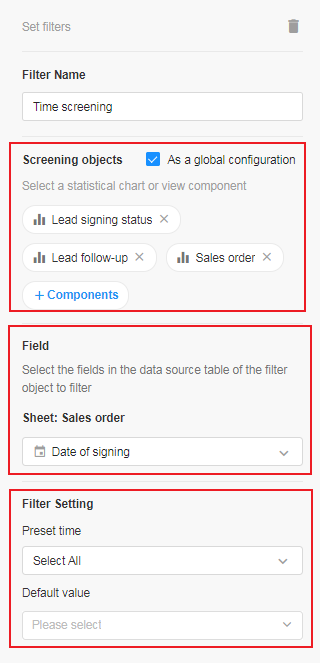
Set the filter-related properties:
Enable filter button, order, filter name, filtered objects, filtered field, time, and default value.
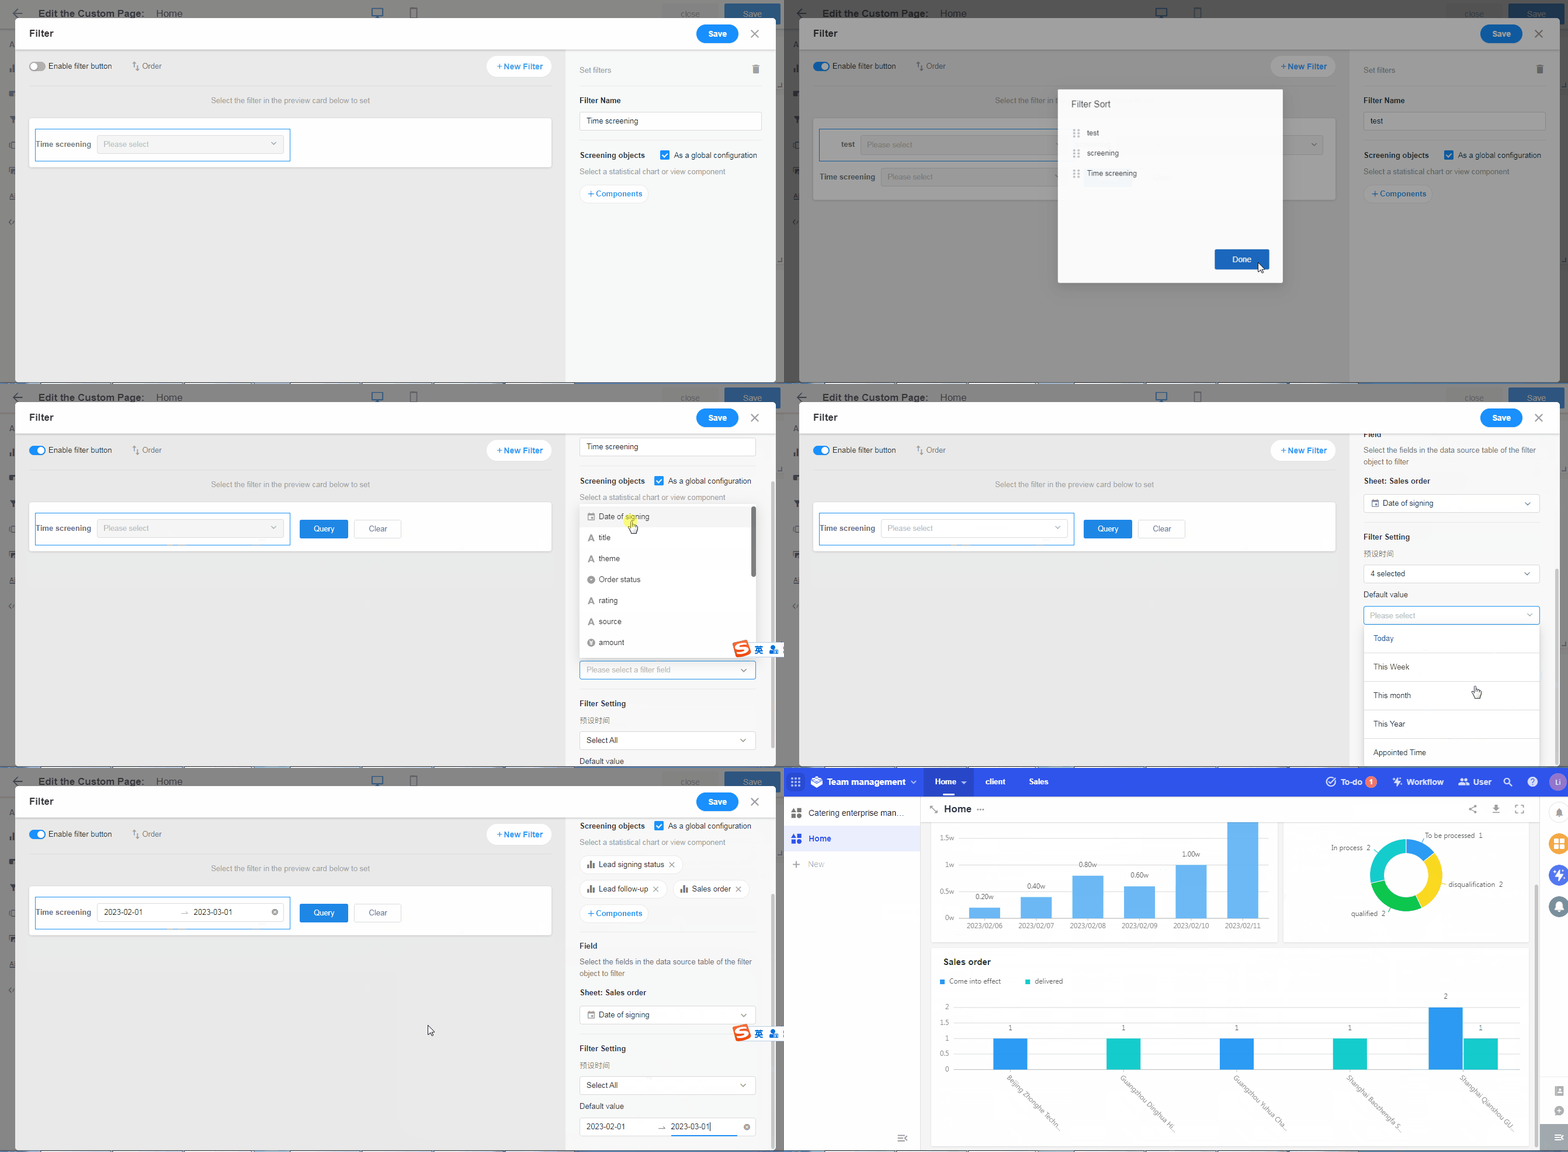
Example: Example: Add a time-based filter. All specified charts will be filtered by the set time range.
Set the name of the filter
Filtered object: The selected charts are [Lead Signing Status], [Lead Follow-up], [Sales Order].
Filtered fields: [Signing Date] field in [Lead]; [Date] field in [Sales Order].
4. Save
After configuring the, click [Save], you can see the filter in the custom page.
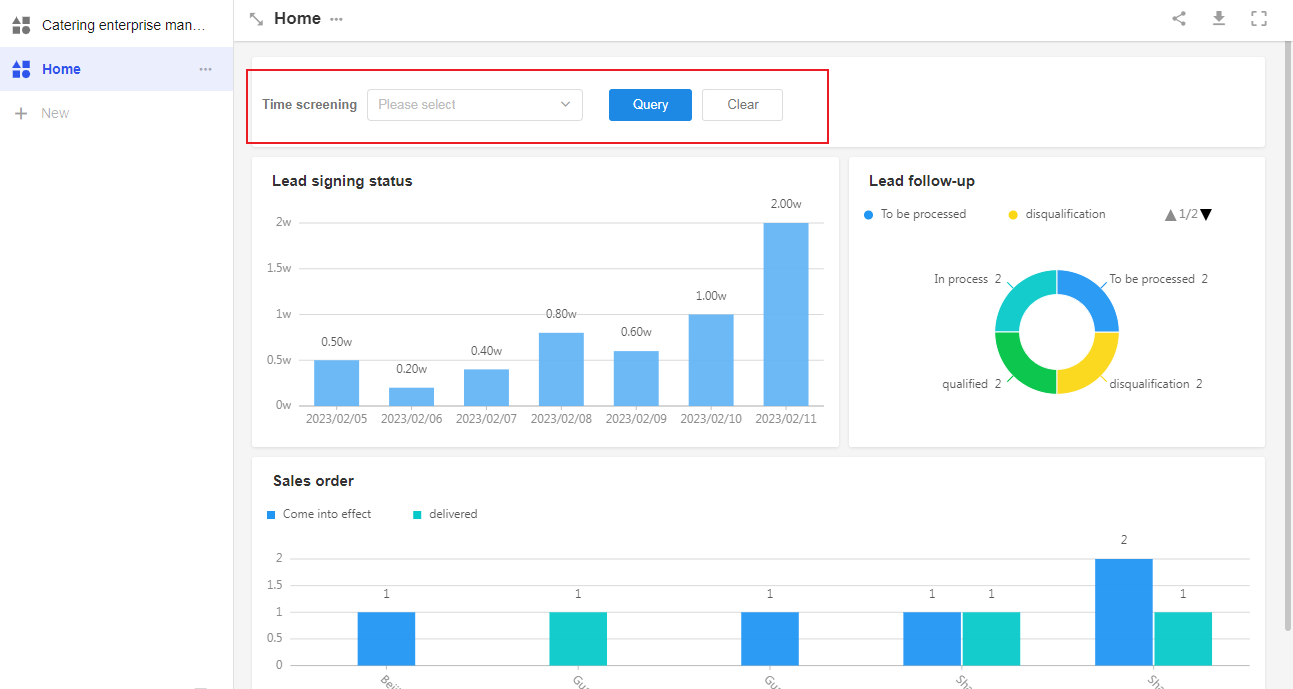
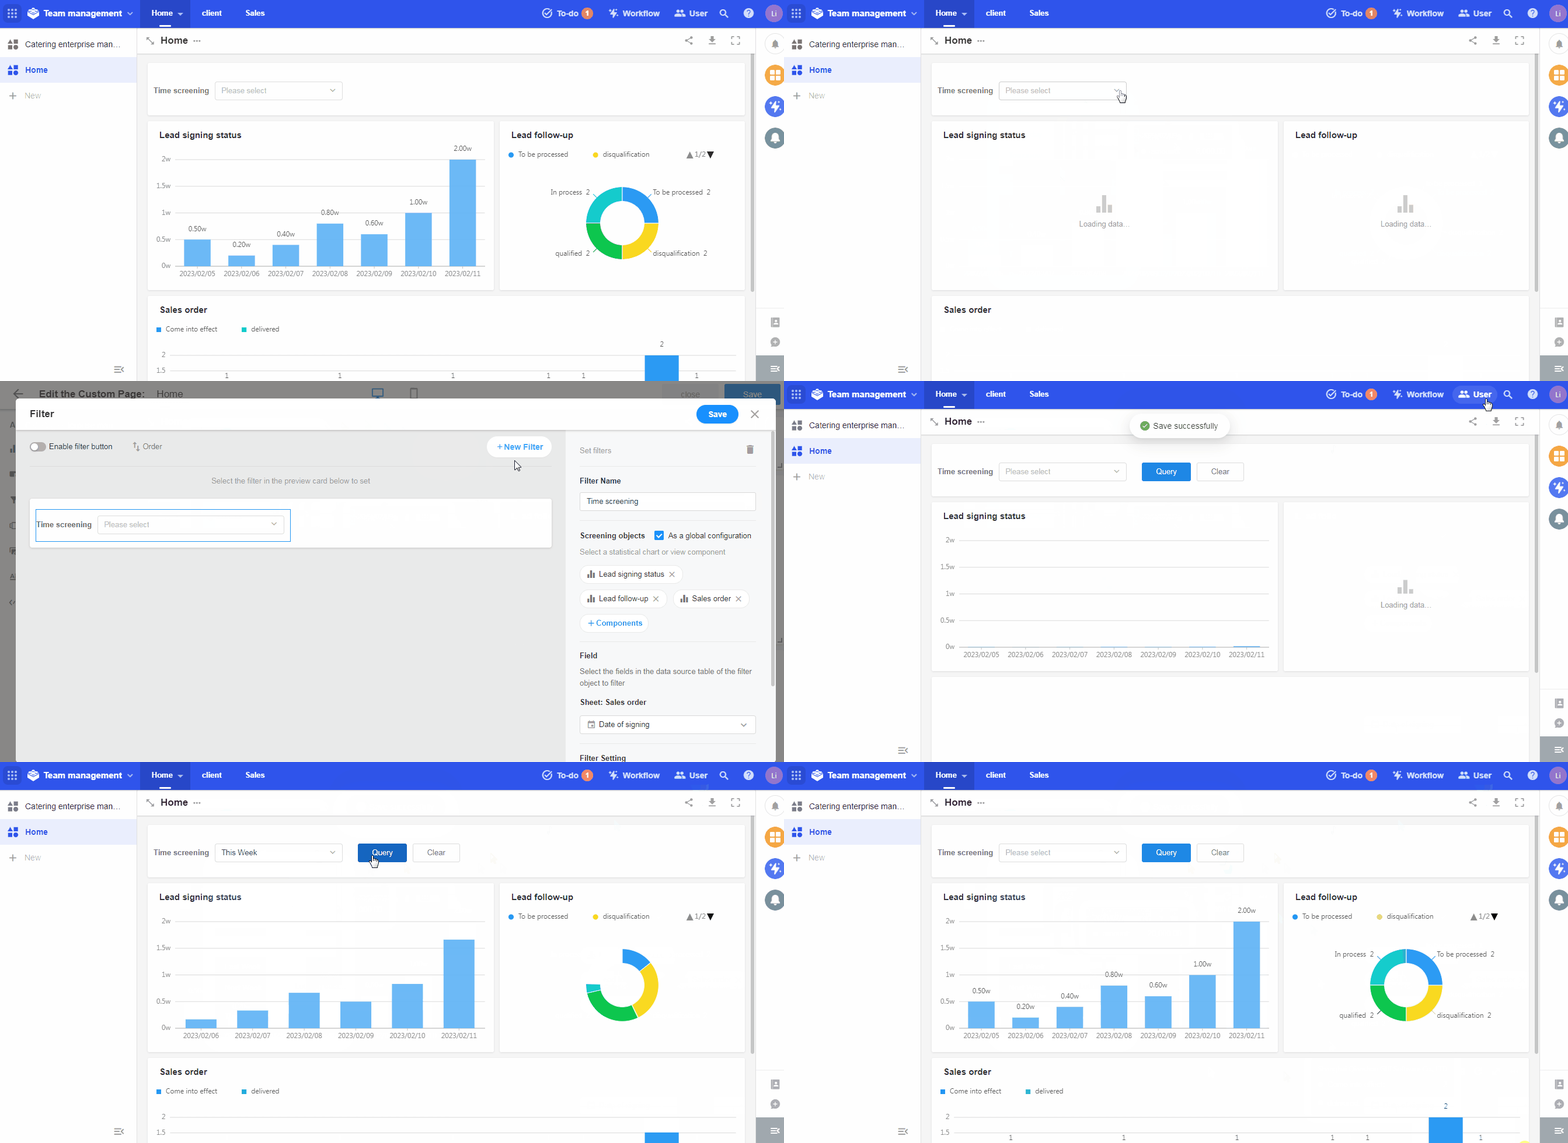
When the filter button is enabled, you need to click the [Query] button when using the filter on the custom page to display the eligible data; if it is not enabled, the filtered data is displayed in real time.
Have questions about this article? Send us feedback