What is custom action
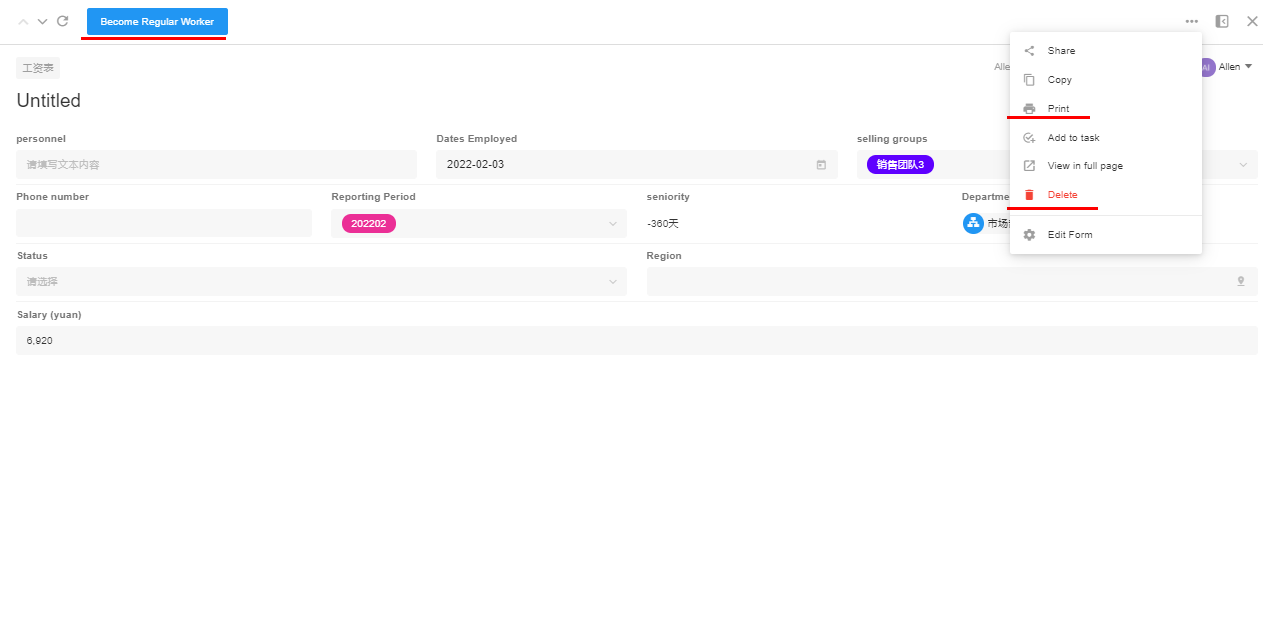
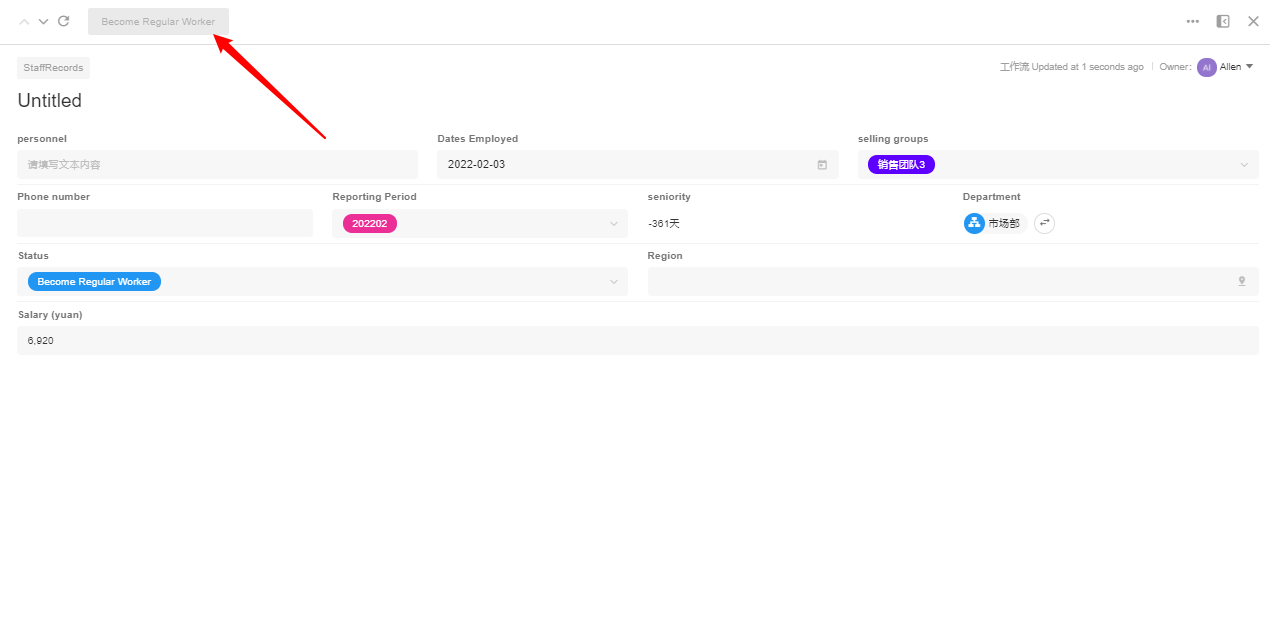
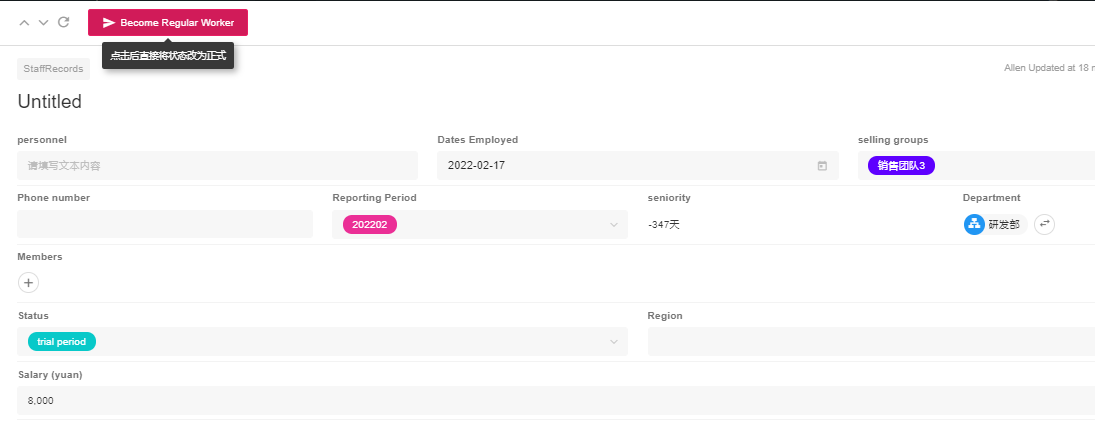
APP Admin can add a button to the details page of an existing record. Users can click this button to fill in the specified fields or initiate a workflow, which is called custom action. In the following figure, [Become Regular Worker] is a button added by Admin, [Share], [Print], and [Delete] is the system button.
Effect
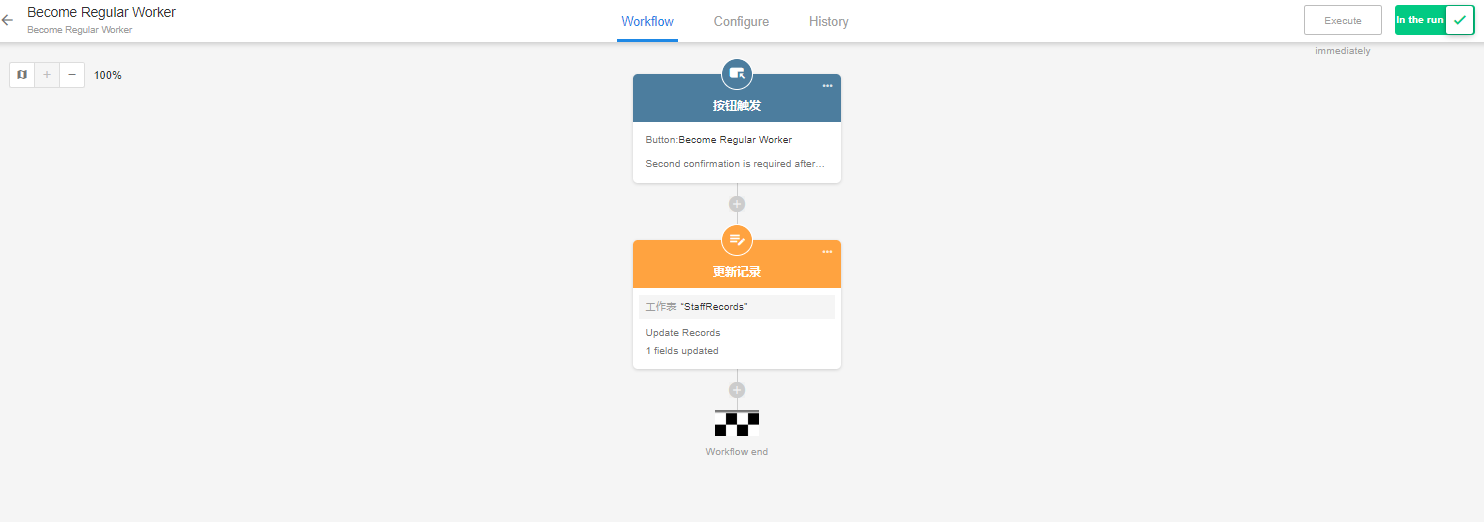
Clicking the [Become Regular Worker] button can trigger the workflow and the [Status] in the record will be updated to [Regular].
Clicking the button can bring up a pop-up window for the operator to fill in the fields. For example, after clicking the [Quit] button, the operator is required to fill in the time.
Click the button to bring up a pop-up window for the operator to fill in a field, save it, then the workflow is triggered.
Ⅰ. How to set custom action
Entrance
Custom actions can be set in both worksheets and views.
Set Custom Action in Worksheet

Set Custom Action in View
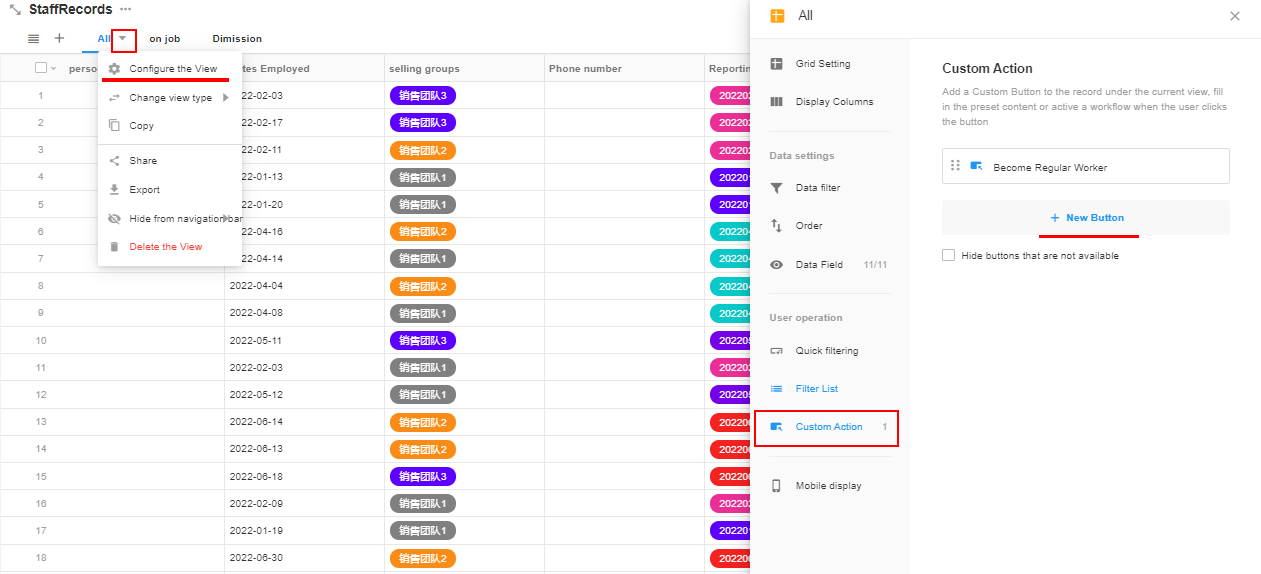
Tip: Buttons created in the view are automatically synchronized to the worksheet; on the button management page in the worksheet, you can set in which views the buttons are available.
Configure Button
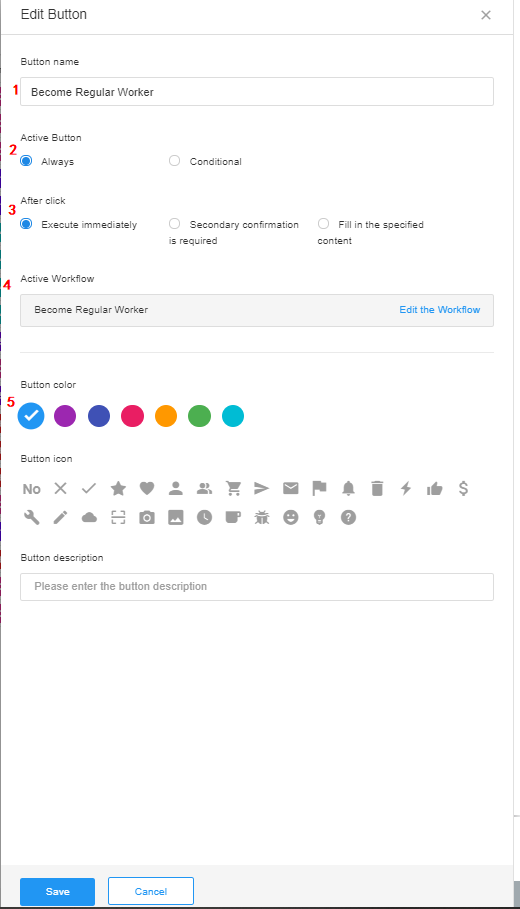
1. Set Name
There is no character limit for button names. 4 characters or less is recommended.
2. Enable Button
[Always]: The button is always available.
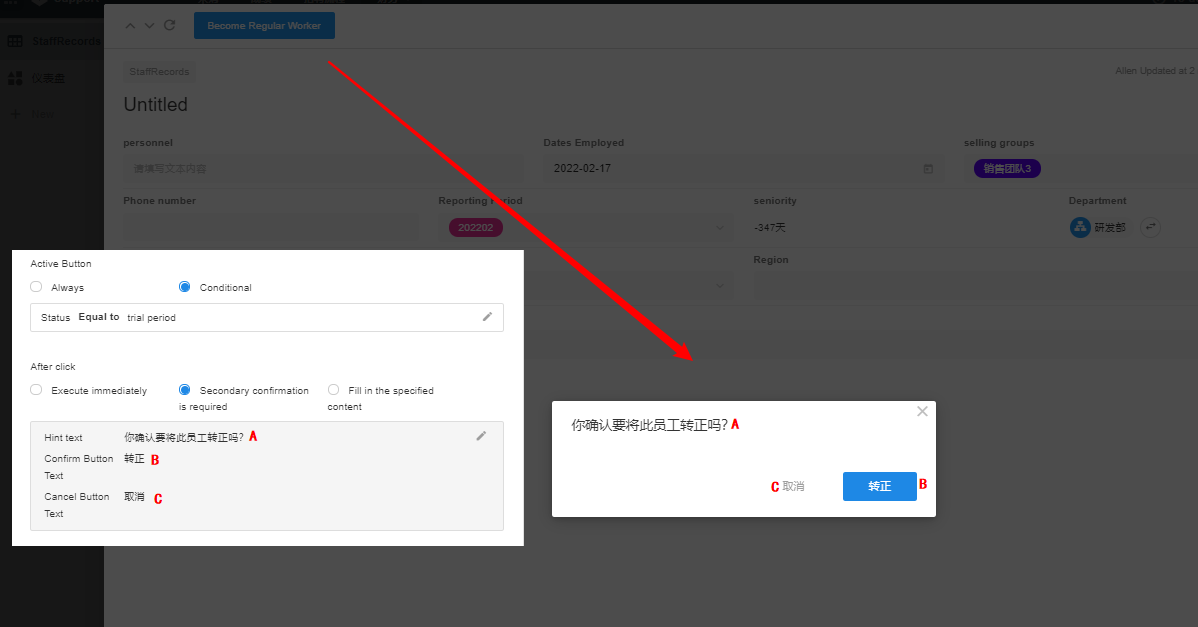
[Conditional]: The button is available only when the set conditions are met, otherwise the button is grey and unavailable.
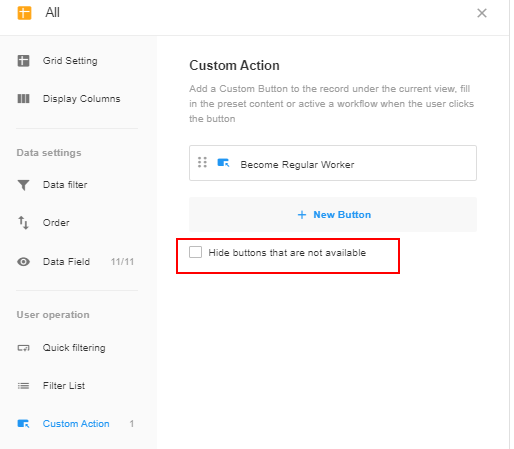
Hide Button
The button cannot be clicked if the conditions are not met. If you need to hide it, you can check [Hide buttons that are not available] in the view.
3. After Clicking
It means what action is required after clicking the button, whether to execute a workflow, or to prompt the operator to confirm again, or to fill in a specified field.
Execute a workflow: The workflow is triggered and the current record is automatically refreshed after clicking.
Prompt to confirm: After clicking, there will be a pop-up window prompting the operator to reconfirm whether to execute the workflow.
Fill in fields: After clicking, the operator is prompted to fill in the specified fields. After filling in the fields, the operator can choose whether to continue starting the workflow or not.
You can set the following:

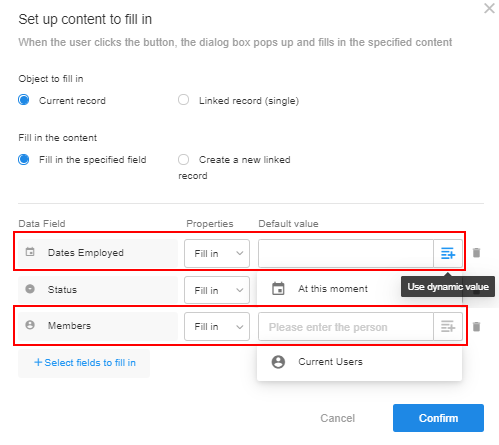
1). Fill in the specified fields in the current record. You can set the default values, and can set dynamic default values for the members and date controls.
2). Add an associated record to the current record.
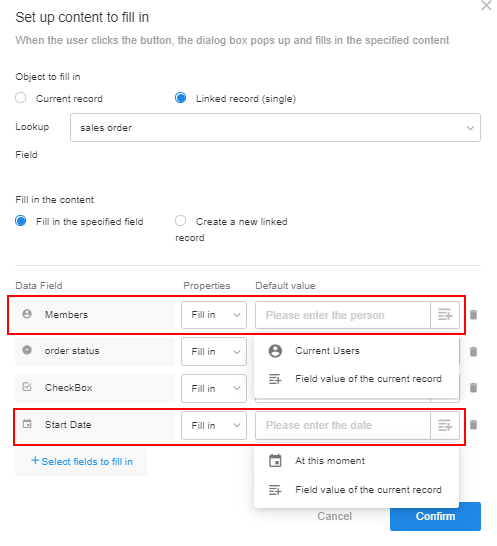
3). Fill the fields in the record associated with the current record. You can set the default values, and can set dynamic default values for the members and date controls.
4). Add another associated record to the record associated with the current record.
4. Execute Workflow
Each button corresponds to a unique workflow, which exists whether it is used or not. When the button is deleted, the workflow is also deleted.
If the button is added for the first time, it will automatically jump to the configuration page of workflows after saving the button.
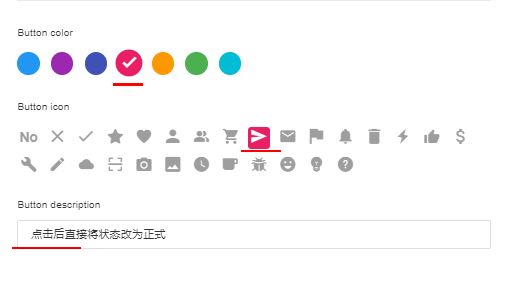
5. Set Icon, Color and Description
You can set the icon, color and description for the button.
Effect:
Ⅱ. Configure and Publish Workflow
Each button corresponds to a unique workflow, which exists whether it is used or not. When the button is deleted, the workflow is also deleted.
More details about workflows
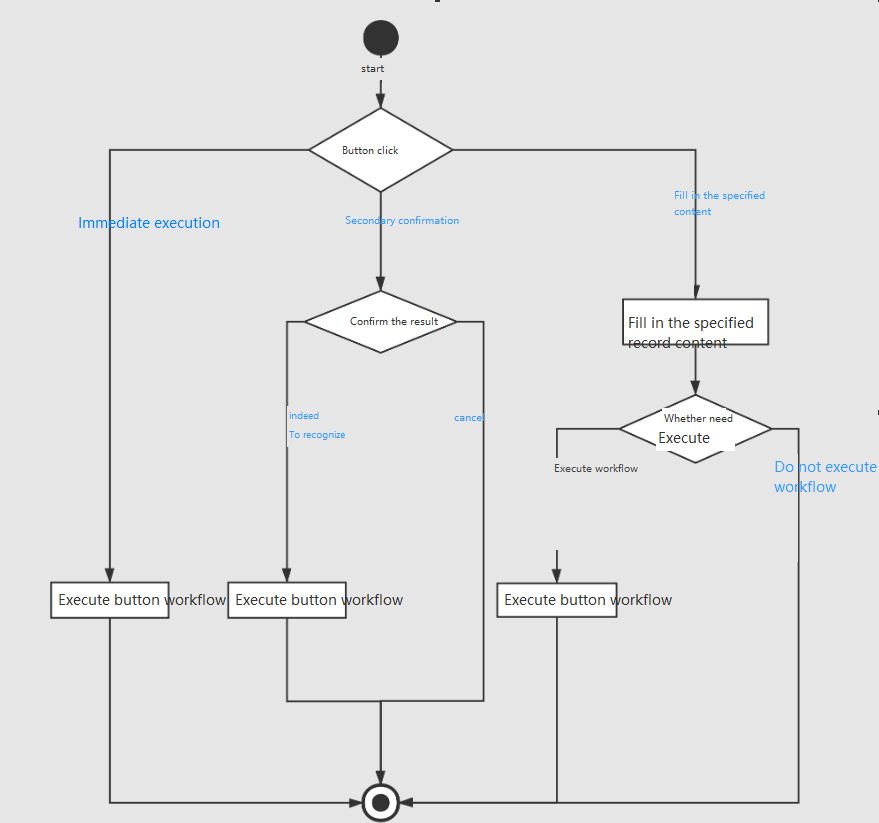
Ⅲ. Flow Chart of Custom Action
Ⅳ. Button Management
After the button is created, you can rename, delete, and sort the button, and set the valid range of the button.
More details about use and management of buttons
Have questions about this article? Send us feedback