Create Application and Worksheet from Excel
To create applications and worksheets by importing excel files, it can not only quickly complete the basic design of the application and forms, but also import data directly into the worksheets.
Create Application from Excel
1. Entrance
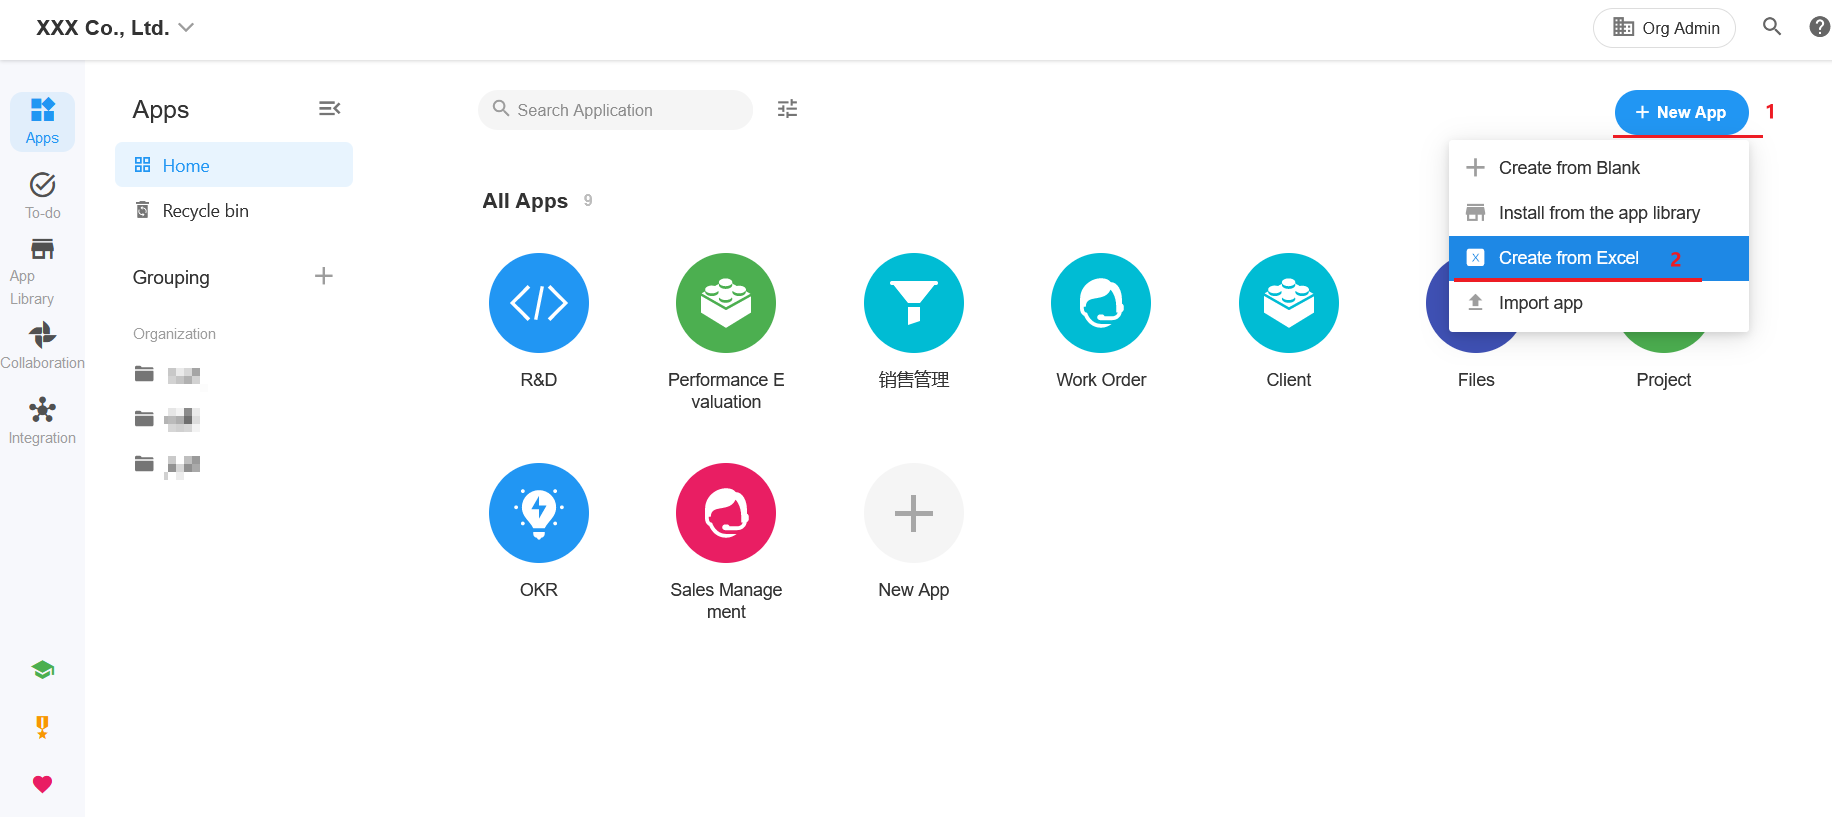
2. Import file

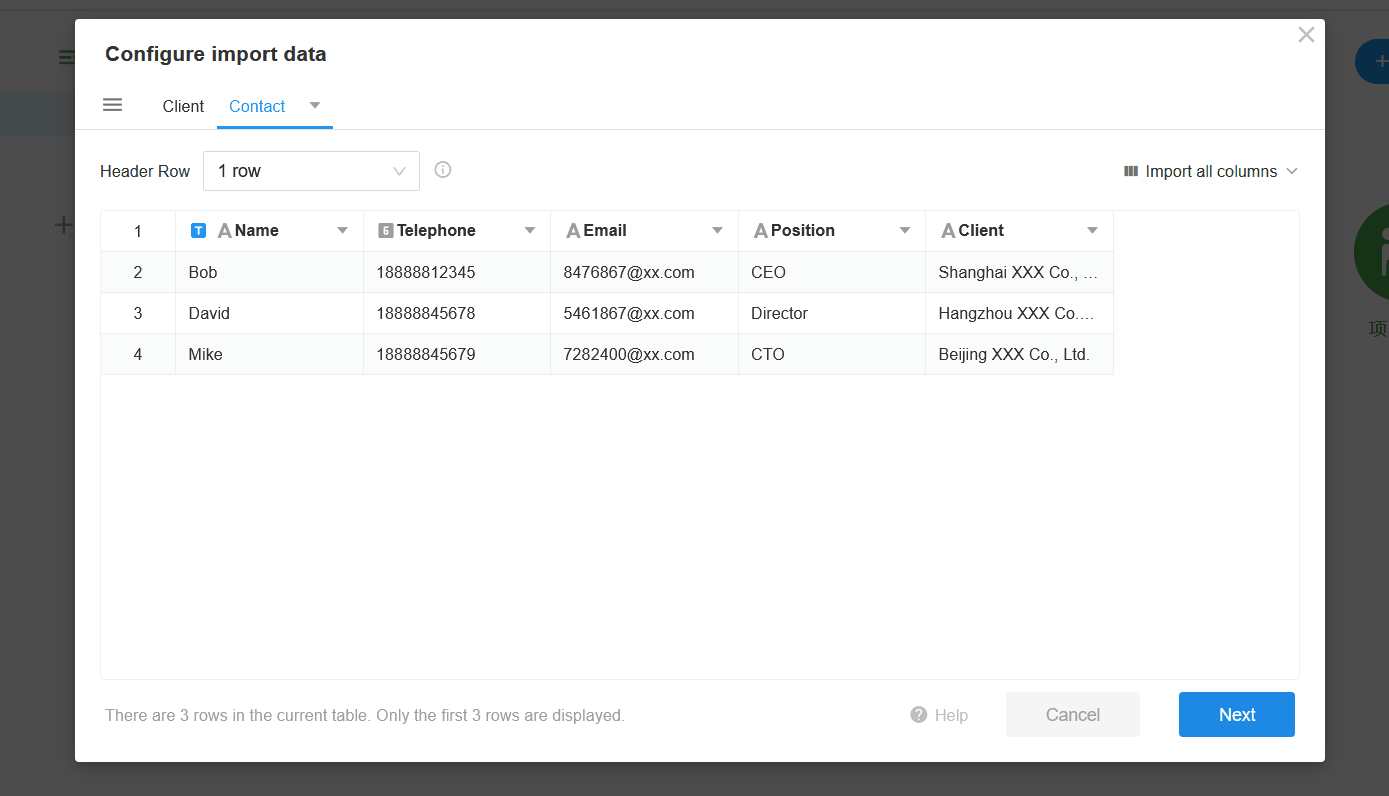
3. Select sheet to import and set name
You can select which sheets are imported, and only the checked ones will be imported as worksheets.
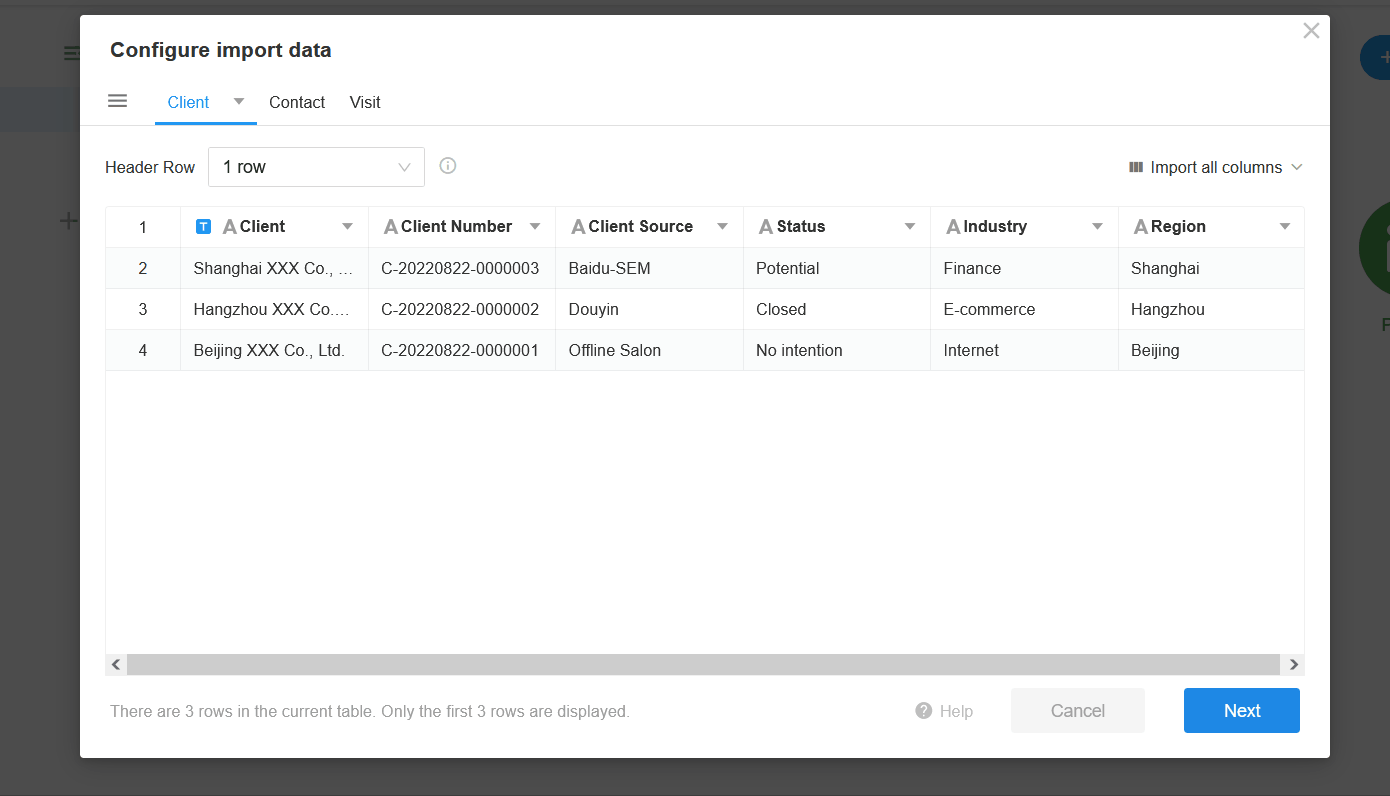
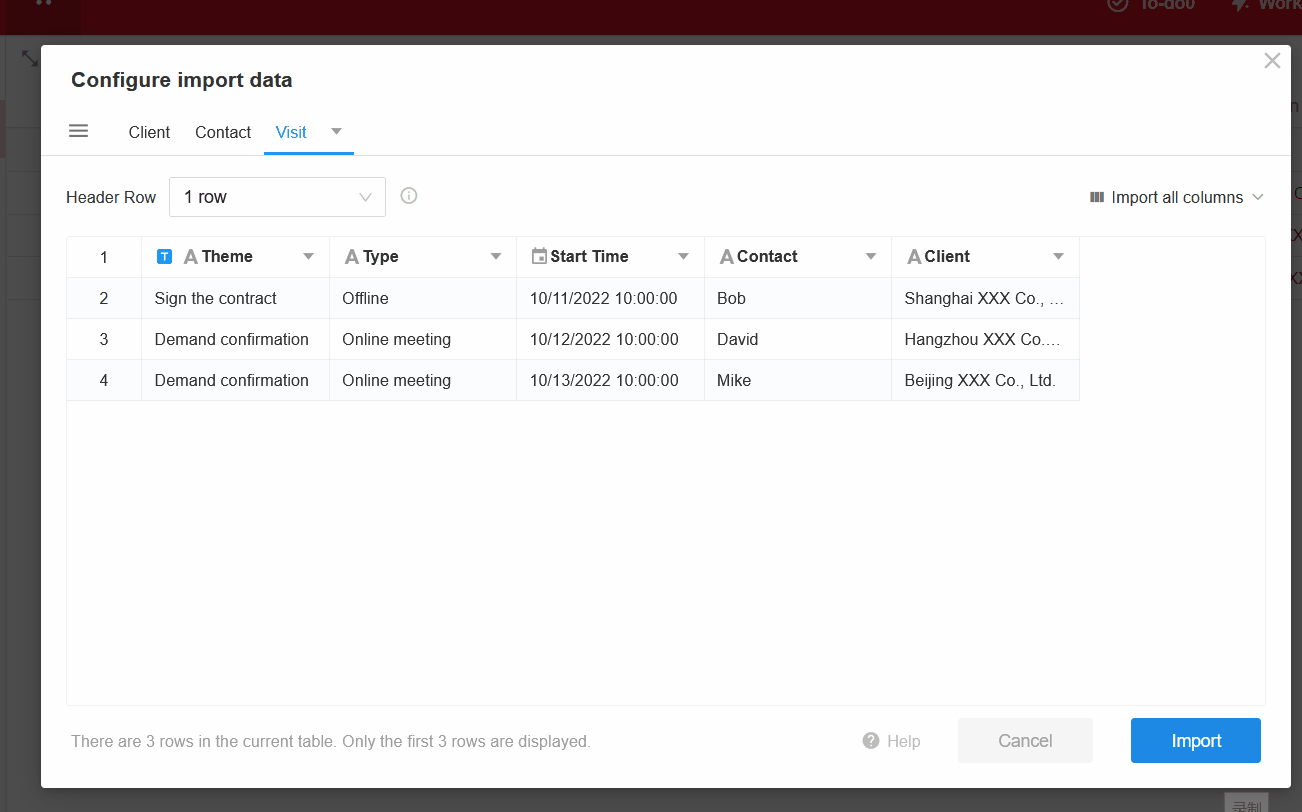
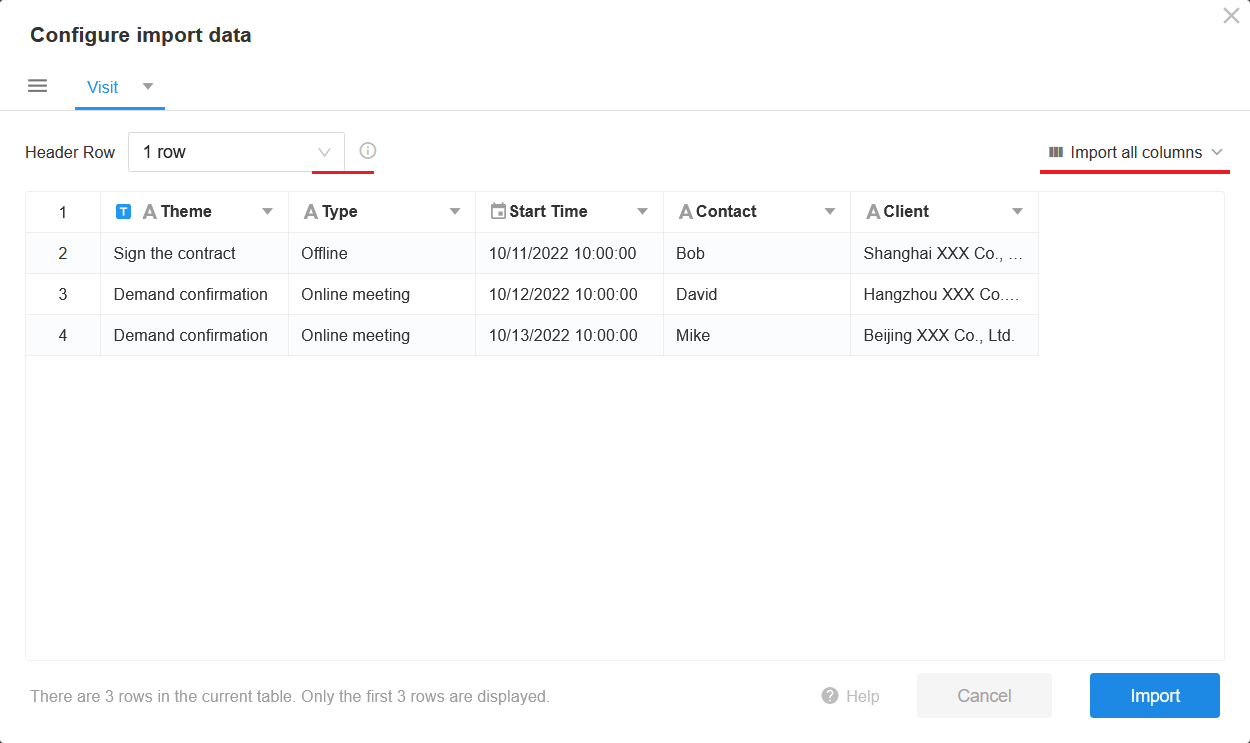
4. Select the header row and which column to import
Select a row in the sheet as the header, the data below the header row can be imported, while the data of the header row will not be imported.

5. Set filed type and name
You can quickly set the title field or modify the field name and type.

Only number, date and Boolean (Check items by default) can be automatically recognized and classified, other contents default to text fields. Please check the type of each field before importing.
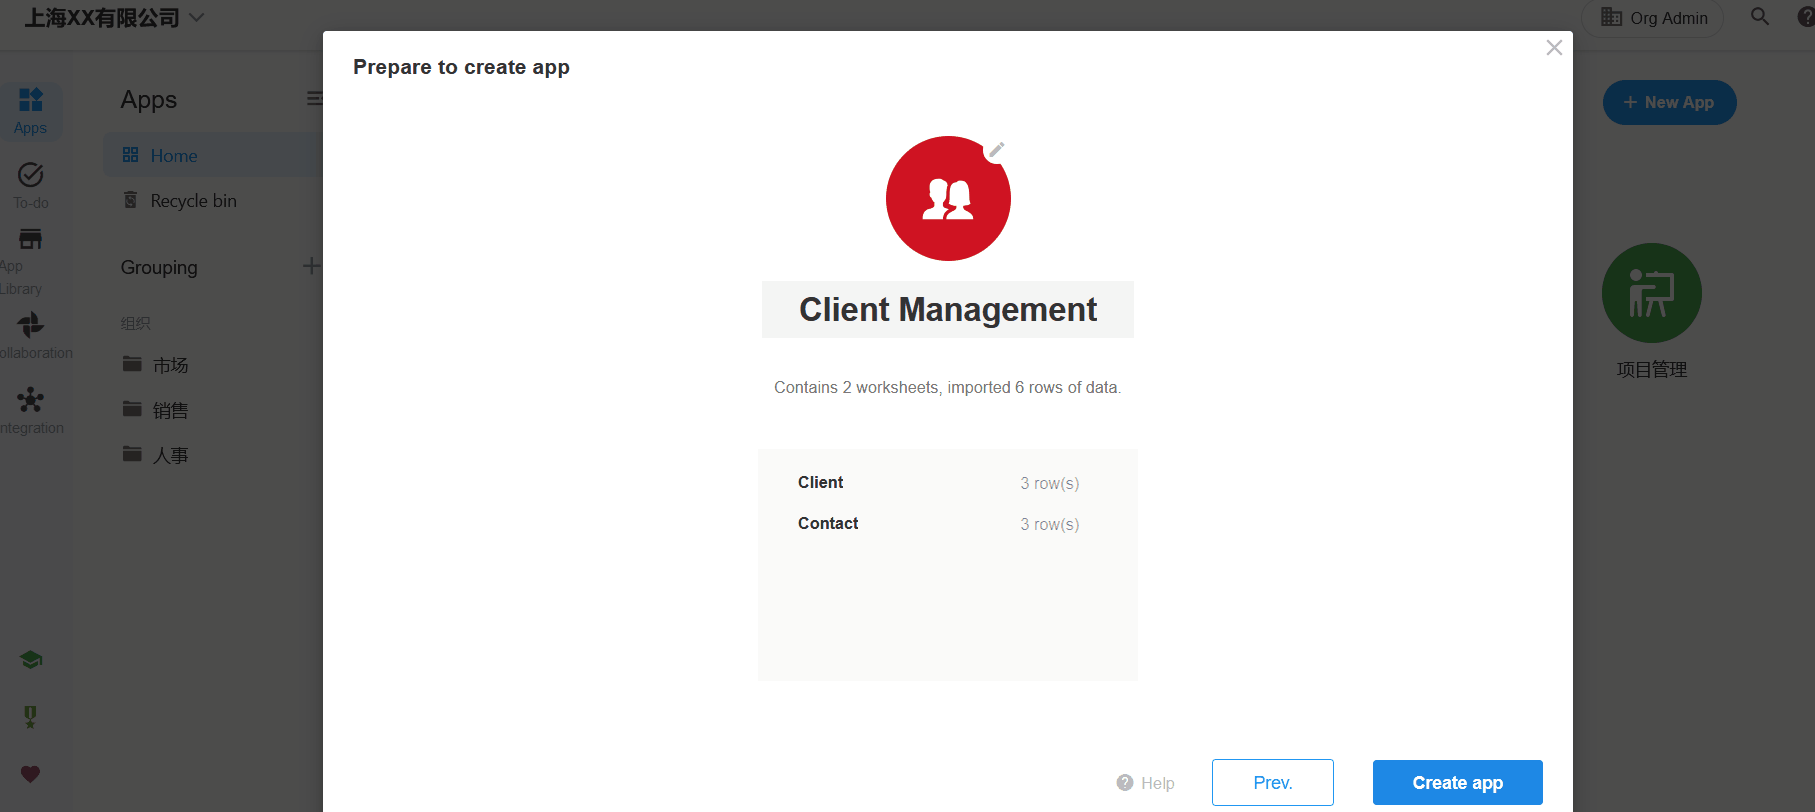
6. Set application name, theme color and icon
After creating the application and importing the data, there will be an application message.
7. Create application and check
Tip: You cannot associate worksheets when creating an application. If you need to import the association as well, you can choose to import the basic sheet to create the application first, and then import the associated sheet separately.
Rules and Restrictions for Importing
- The imported sheet cannot include merged cells, and the merged cells cannot be imported.
- Files no more than 20 MB in format of xls, xlsx and csv can be imported.
- Select up to 20 sheets when importing, and import up to 20,000 rows and 200 columns in a single sheet.
- Import up to 50,000 rows of data (total rows in all sheets) in free edition, no limit for paid edition.
- The first field on the left defaults to the title, if it does not match, the first matching field from left to right is automatically selected as the title.
- Only number, date and Boolean (Check items by default) can be automatically recognized and classified, other contents default to text fields.
Create Worksheet from Excel
1. Entrance
Click [+Application Item] on the left side of the application, select [Create from Excel] and upload or drag and drop the target file.

2. Select sheet to import and set name
3. Select the header row and which column to import
Select a row in the sheet as the header, then the data below the header row can be imported, while the data of the header row will not be imported.
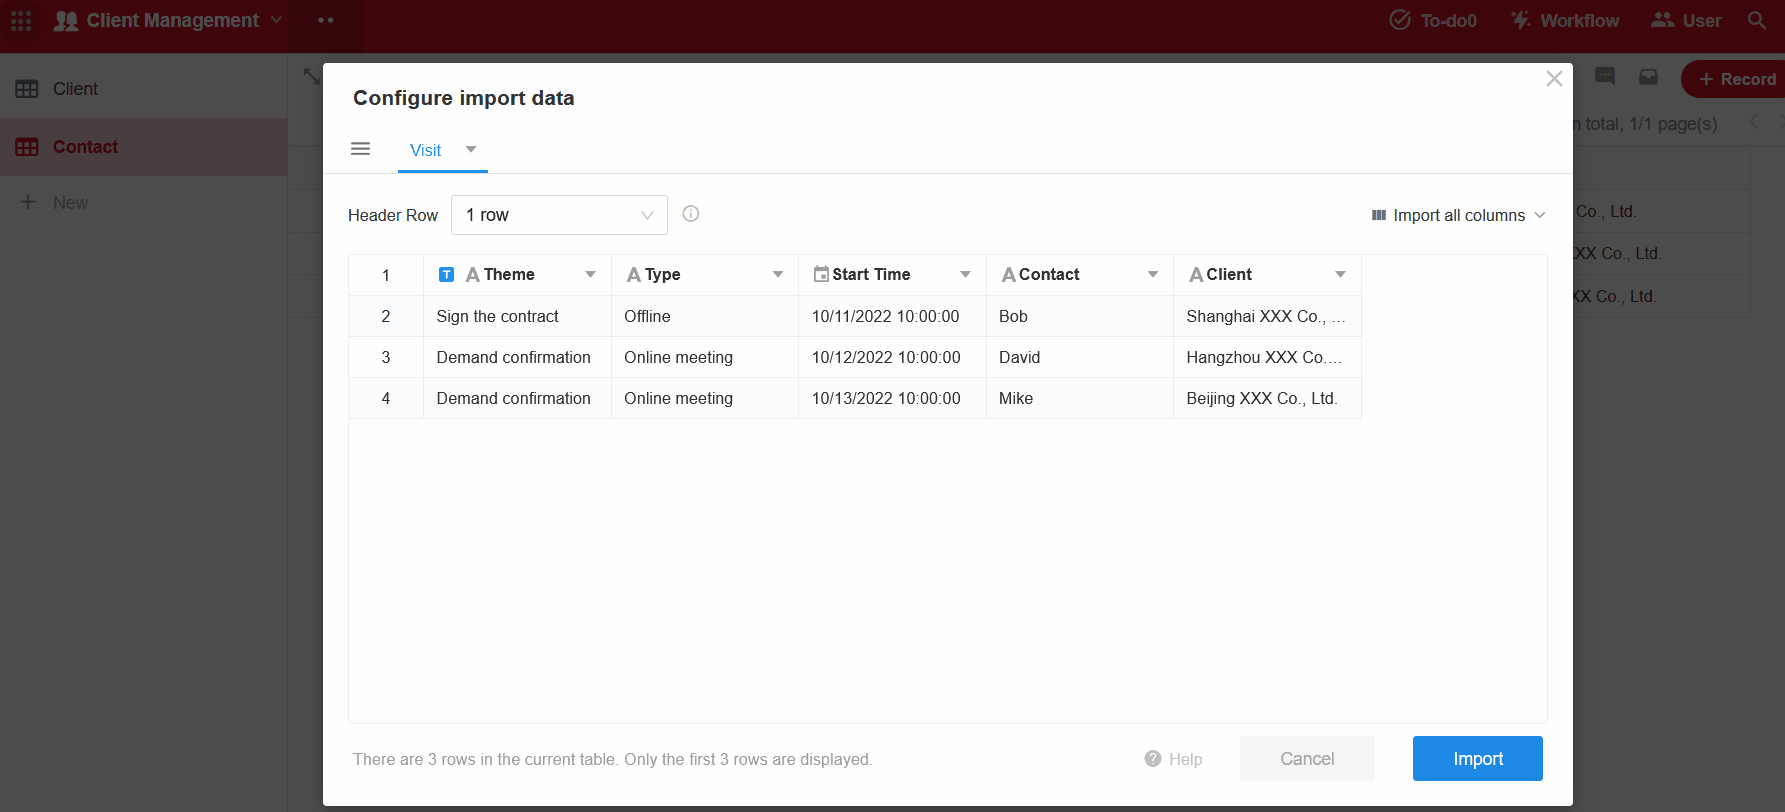
4. Set field type and name
You can quickly set the title field or modify the field name and type.
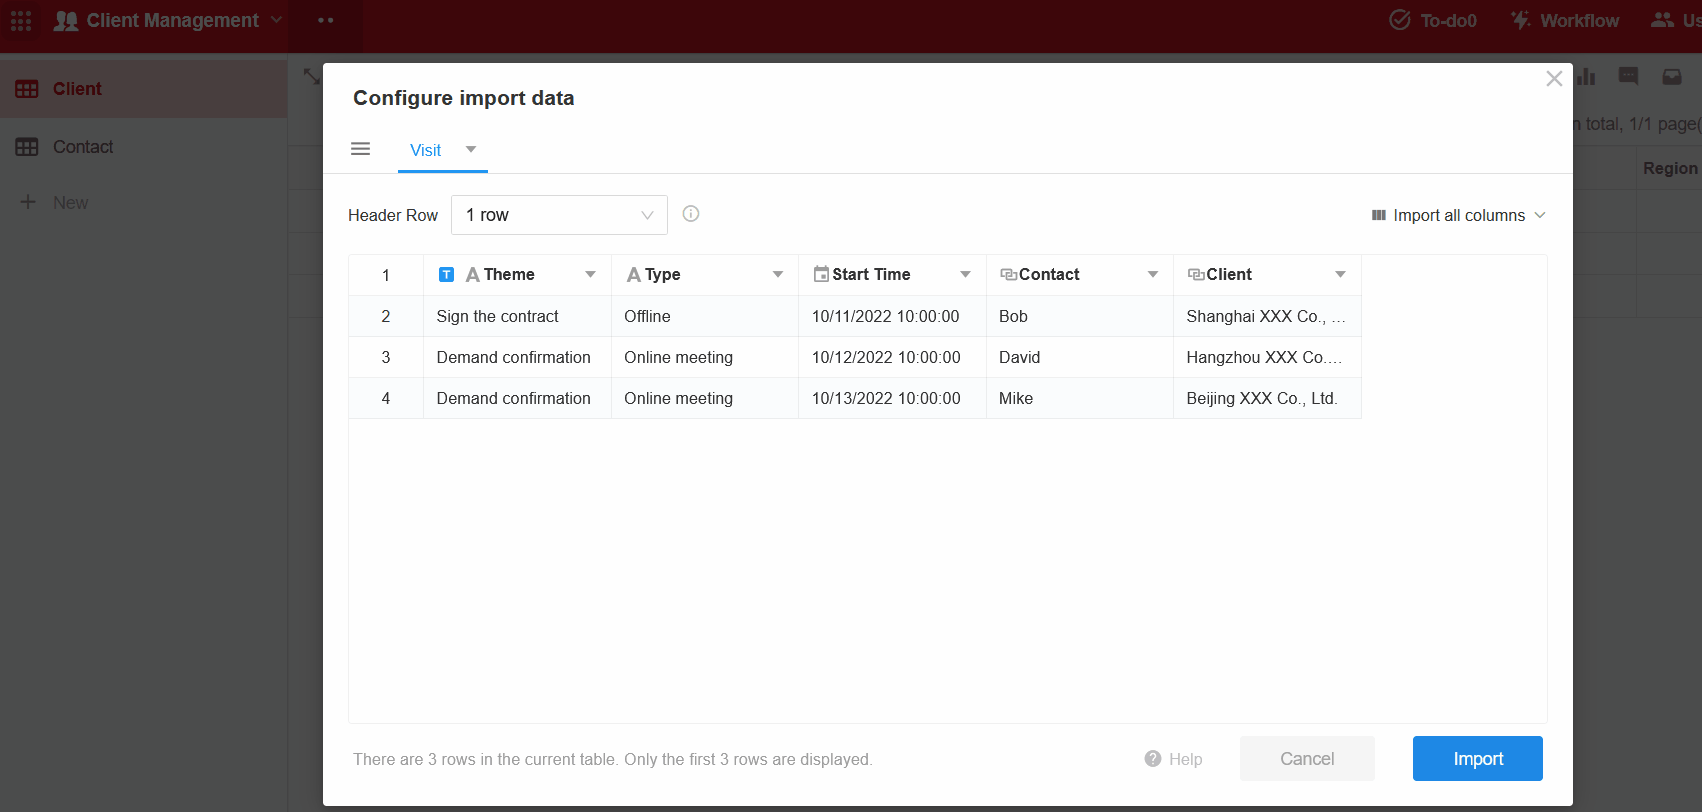
There are associations between sheets Visit and Client, Visit and Contact, thus when setting the field type, you can associate them, after importing, the worksheets will be associated automatically.
You can only select an existing worksheet when setting the associated fields.
5. Import data
After importing sheets, you need to further check the data and fields in worksheet.
Have questions about this article? Send us feedback