Triggering Method: Date Triggering
Date triggering: You can select a date field in the worksheet and the system will monitor the date in all records. Once the date in a record arrives, the workflow will be triggered.
Scenario 1: Each employee’s birthday is recorded in the Employee Information worksheet. Every year, at 9am on the birthday, a blessing message is automatically sent to the employee.
Scenario 2: In the Visit worksheet, there is the time of visit to a certain customer. You can set a workflow to remind the salesperson 2 hours in advance based on the time in the worksheet.
Configuration Step
I. Select [Date Triggering] when creating a workflow
II. Set the trigger
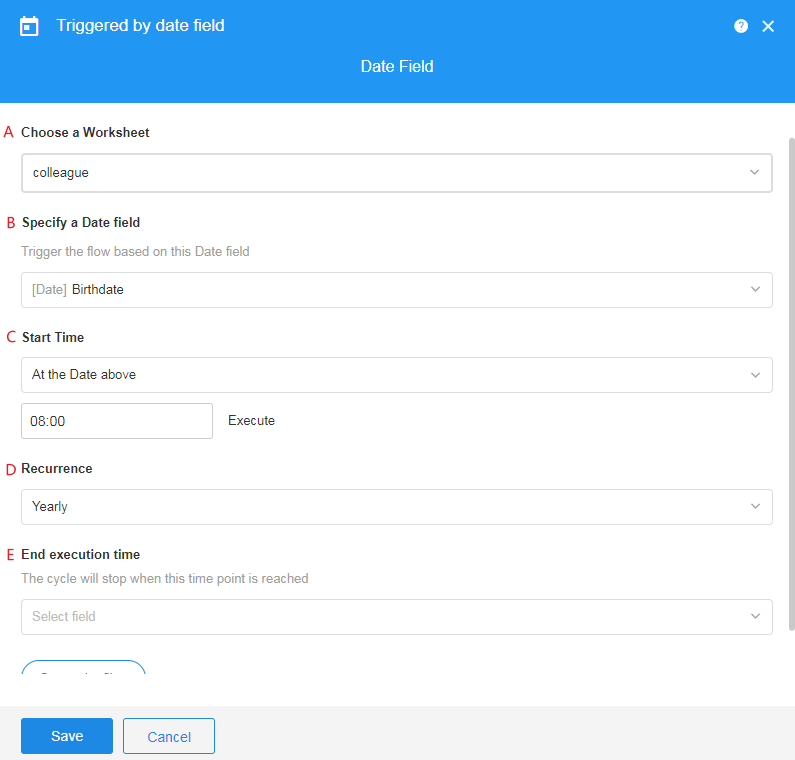
A. Choose a worksheet
All the worksheets in the current application can be selected. We select the worksheet Employee Information.
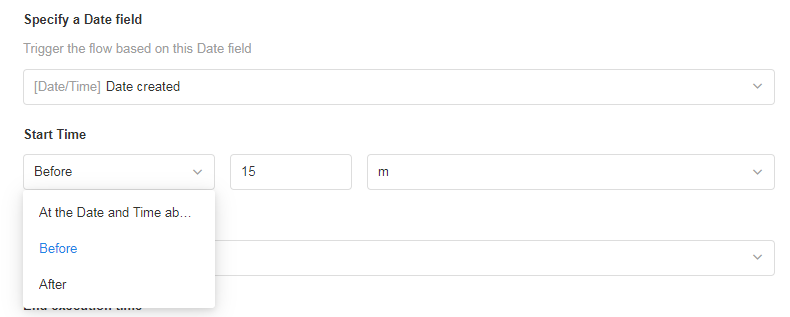
B. Specify a date field
Select a date field or a time field, and the dates in all records in this worksheet will be monitored.
C. Start time
The date and time when the workflow is executed for the first time. The date field and the date/time field are configured differently.
Date field
Since there is not a specific time in date fields, for the trigger time, you need to set a time manually. The actual trigger moment can be a few days before or after the date, or it can be on the above date (the date selected in the record).

Date/Time field
There is specific time in such date fields, so you do not need to set a trigger time manually. The actual trigger moment can be earlier or later by X minutes (hours/days).
D. Recurrence
You can set whether to trigger the workflow repeatedly according to your actual needs. You can select [no repetition], [yearly], [monthly], or [weekly].
E. End execution time
Sometimes, a workflow doesn't need to be executed in an infinite loop. You can set an end time at which the workflow will not be triggered again.
Only workflows that are repeatedly executed can be set an end execution time.
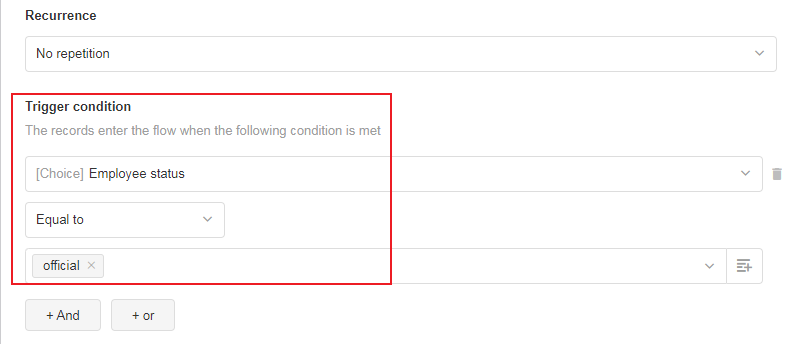
Ⅲ. Set the filter
Only records that meet the conditions can trigger the workflow. If the record does not meet the set conditions, the workflow will not be triggered even when the date arrives.
For example, if you set up a workflow to send messages to employees on their birthdays, only employees who are “active” meet the criteria.
Ⅳ. Add actions
Once setting up the trigger, you can add the required nodes.
Example 1
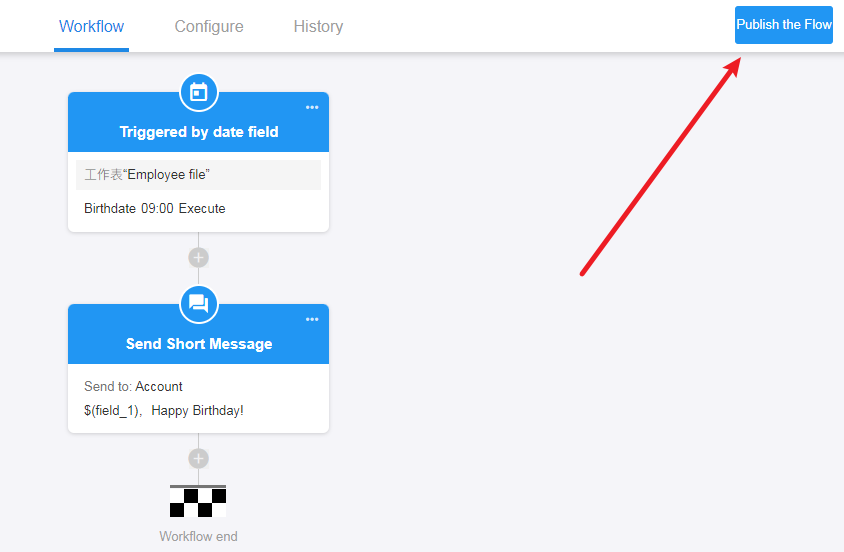
Each employee’s birthday is recorded in the Employee Information worksheet. Every year, at 9am on the birthday, a blessing message is automatically sent to the employee.
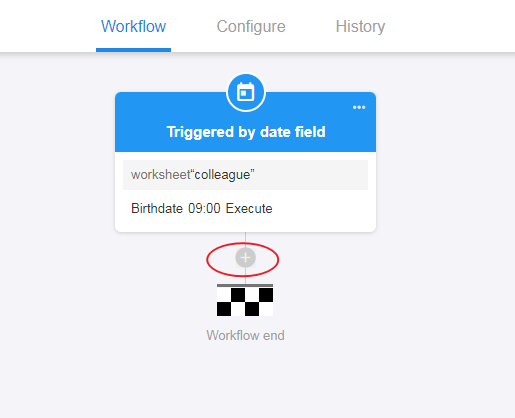
1. Set the trigger

Note
As shown above, select the field [Birthday], which is a date field. There is not specific time in such fields, so you need to set a specific time.
Start date: it defaults to the date of the date field, i.e., the employee’s birth date.
Start time: it defaults to 8am and can be modified.
End execution time: not set.
Recurrence: yearly
Filter: Only records with “official” status can trigger the workflow.
2. Add actions (to send a blessing message)
Add and configure the node [Send short message].

3. Publish the workflow
Example 2
Set a workflow to remind the salesperson 2 hours in advance based on the time in the worksheet.
1. Set the trigger
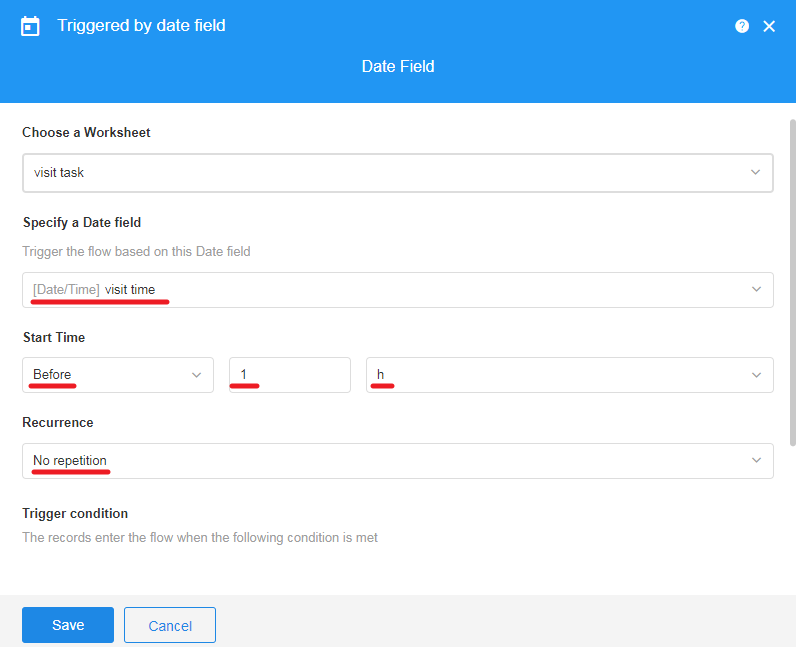
Start time: since it is a date/time field, you do not need to select a specific time.
No detailed introduction to the notifying node.
Video demonstration
https://learn.mingdao.net/course/4
Have questions about this article? Send us feedback