How to create a workflow
An automated workflow consists of a trigger and several action nodes.
Trigger or Trigger Node is the switch that starts the workflow. The workflow can be started only if the conditions of the trigger are met.
Action nodes are operations that are automatically executed in the workflow. For example, data operations, notifications, approvals, and other tasks in the workflow require the corresponding action nodes to complete.
Key Steps for Creating Workflow
Step 1: Select and configure the trigger mode.
Step 2: Set up the required nodes in the workflow.
Step 3: Set up the configuration of the workflow during execution.
Step 4: Save and publish the workflow.
Step 5: Run and test the workflow.
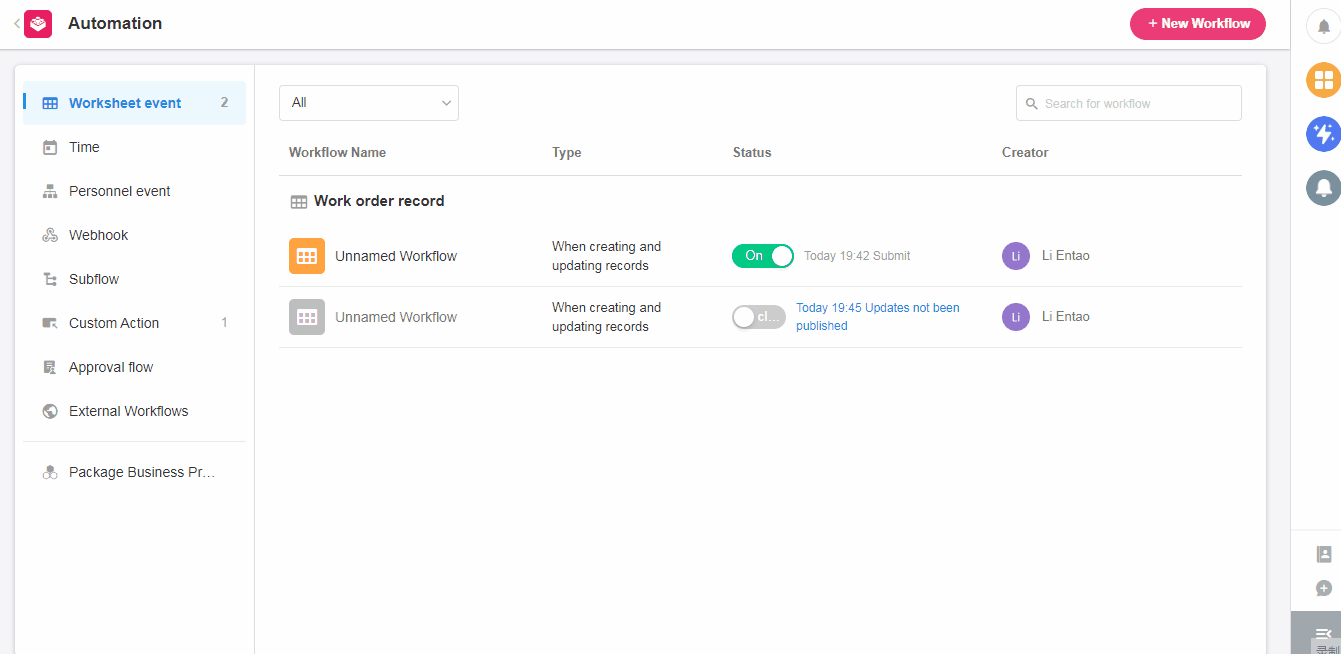
Go to the workflow management page
APP Admin clicks [Workflow] to enter the workflow management page in current application. Click [New Workflow] to start creating.
1. Select Triggering Mode
There are 5 triggering modes.
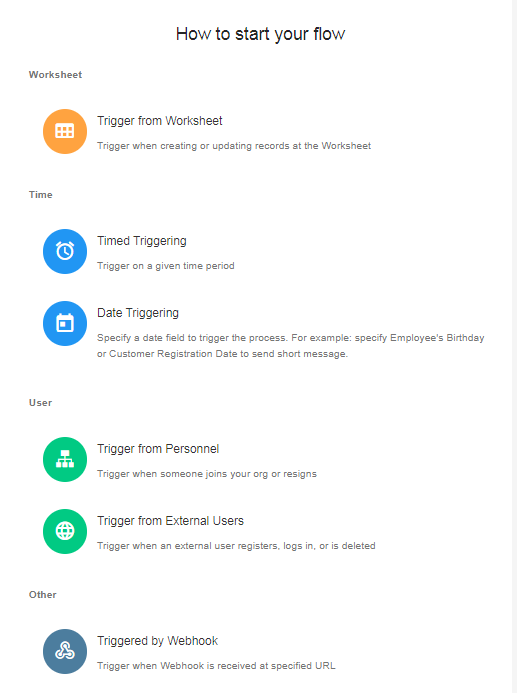
1. Trigger from Worksheet: When a record is created, changed or deleted in a worksheet, a workflow can be triggered.
Example: if a new record is added to the Reimbursement worksheet, a workflow will be triggered to notify the leader for approval.
Click here to view detailed settings
2. Timed Triggering: You can set a cycle time, and whenever a cycle time is reached, the workflow will be triggered to execute an action.
Example: you can set a workflow to send a reminder to your colleagues at 6pm every working day: [Time to leave work, don’t forget the daily summary].
Click here to see the details of the settings
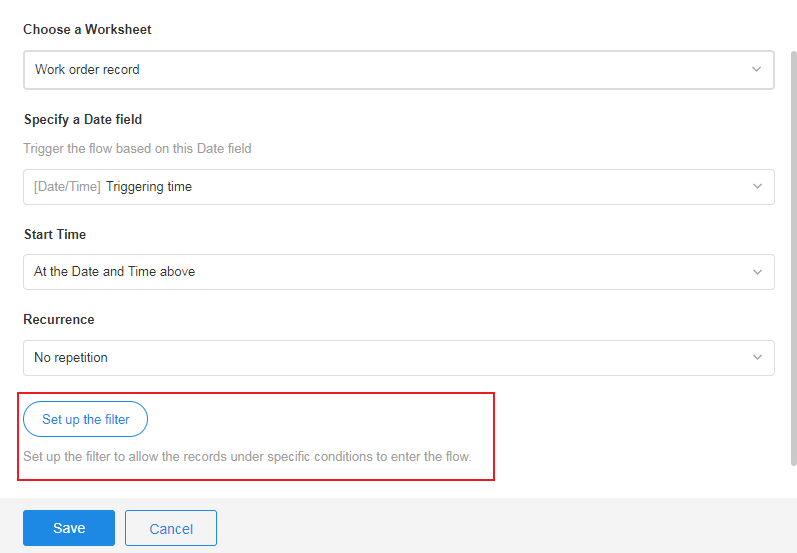
3. Date Triggering: Select a date field in the worksheet to form a schedule, and the workflow will be triggered whenever one of the dates in the table is met.
Example: select the employee’s birth dates (date field) in Employee Information worksheet, whenever it is a birth date, the workflow will be triggered to send a blessing SMS to the employee.
Click here to view the details of the settings
4. Trigger from Personnel: When someone joins or leaves the organization, the workflow will be triggered.
Example: if you manage members information in your organization in the Employee Management worksheet, when a member leaves, the workflow is triggered and the member is marked as [Left] in the worksheet.
Click here to view detailed settings
5. Triggered by Webhook: The worksheet supports passive data reception. When there are data changes in other systems, the changed data can be pushed to the platform server. After the server receives the push message, the workflow can be triggered and then the planned operation can be executed automatically, thus realizing the data interfacing with other systems.
Click here to see the details of the settings
2. Add and Configure Nodes
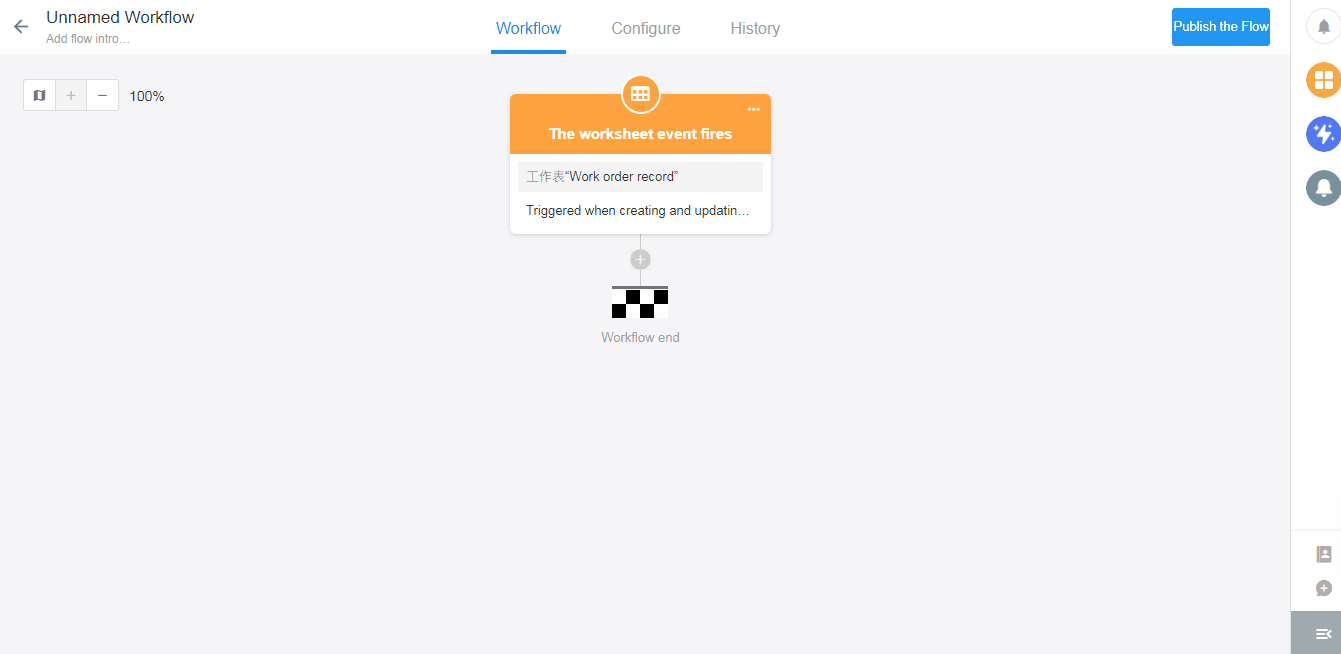
You can continue setting up new nodes after one until the end of the workflow.
For example, after creating a record of request, approve it first and then notify different people depending on the data.
You can set the workflow as following:
[Trigger from Worksheet] > [Approval] > [Branch] > [Send station notice]
Notification 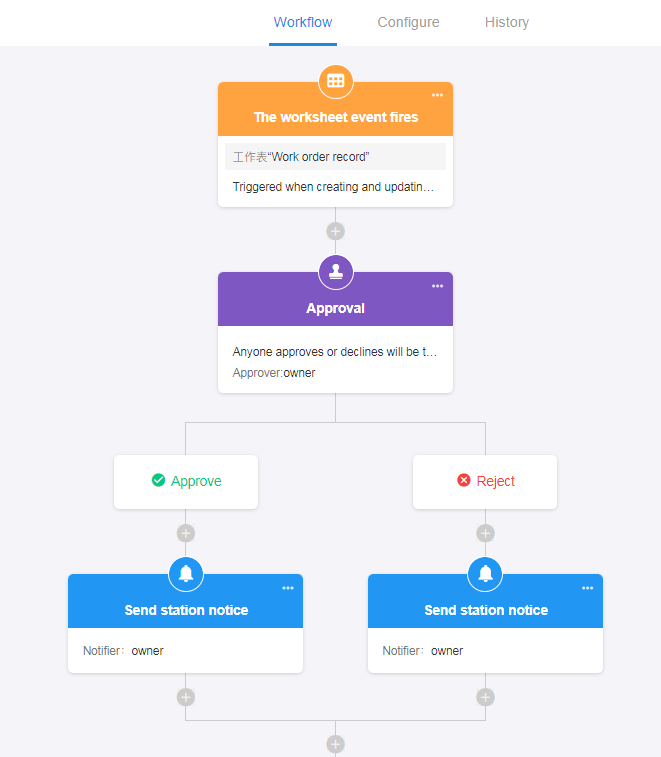
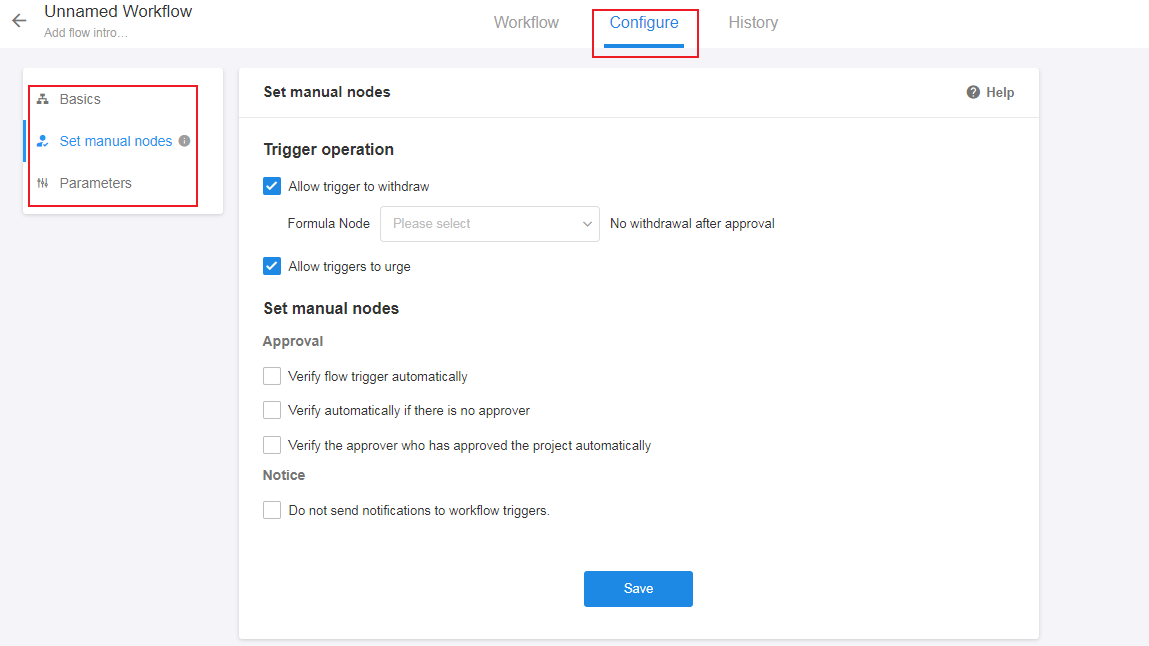
3. Workflow Configuration
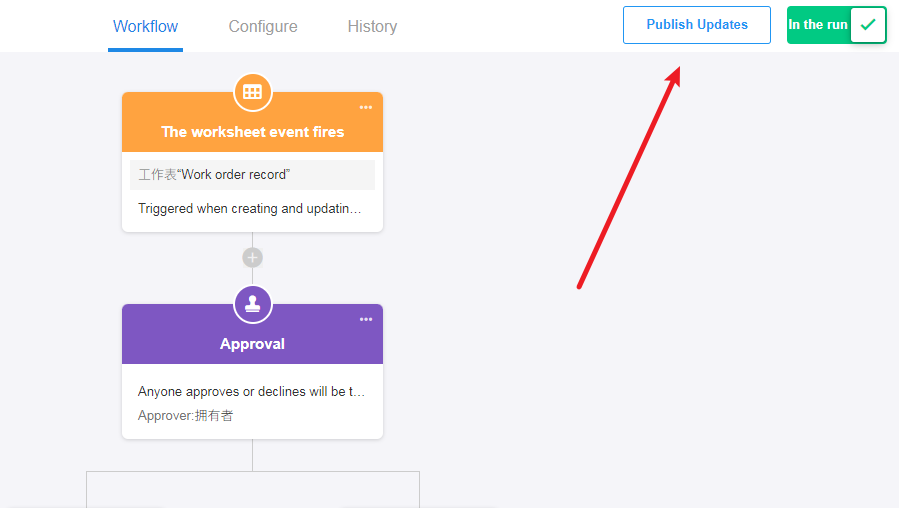
4. Publish/Update Workflow
After setting up the workflow, be sure to click [Publish the Flow]; if you are modifying the workflow, click [Publish updates].
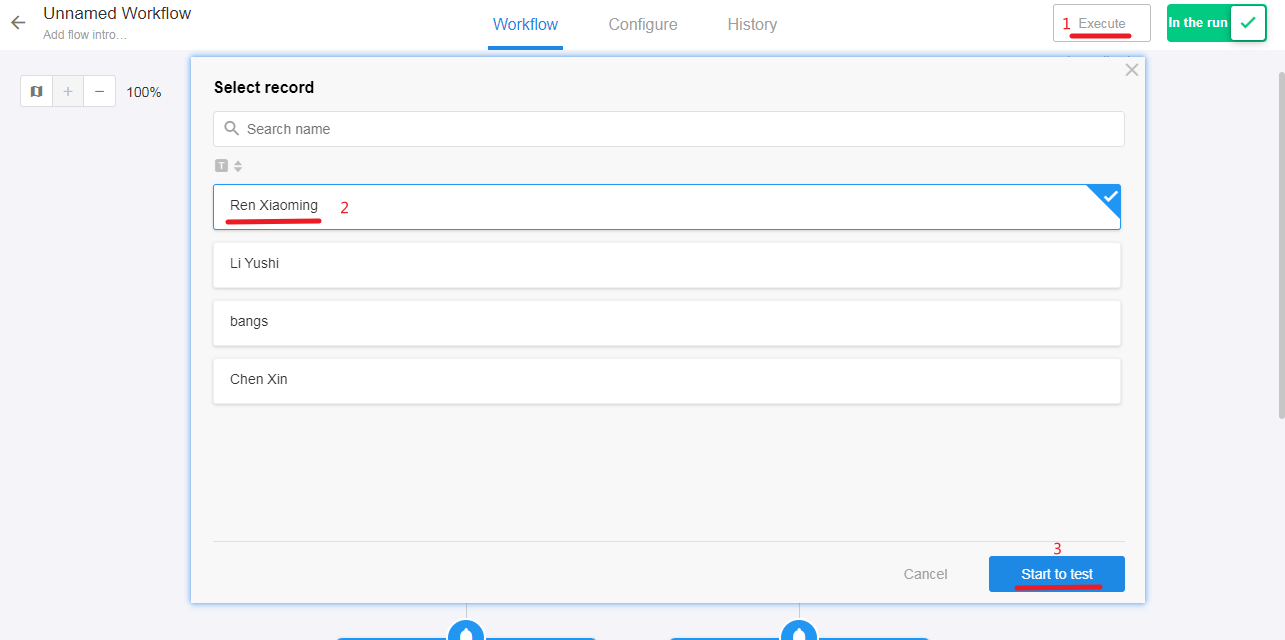
5. Test
When a workflow is published or updated, you need to test whether it can be executed as expected. You can click [Execute immediately] and select a record to trigger the workflow and test.
Note: If you configure the conditions for filtering data in a node, the selected records must meet the conditions that trigger the workflow.
Types of workflows that can be quickly tested:
- Trigger from Worksheet
- Timed Triggering
- Date Triggering
- Custom Action
Notes for testing workflows:
For the workflow that is triggered after deleting a record, the selected record will not be deleted when testing.
After the workflow is executed, the person who triggers the workflow is the one who clicks the test; the triggered time is the test time.
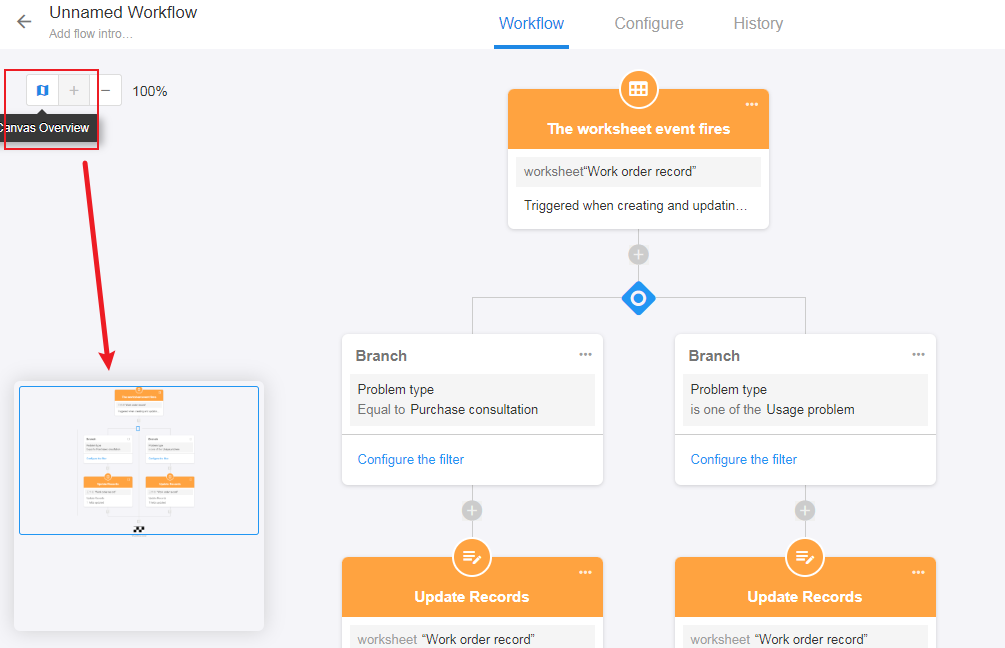
6. Workflow Thumbnail
You can click [Canvas Overview] on the left side and drag to preview the configuration of the nodes.
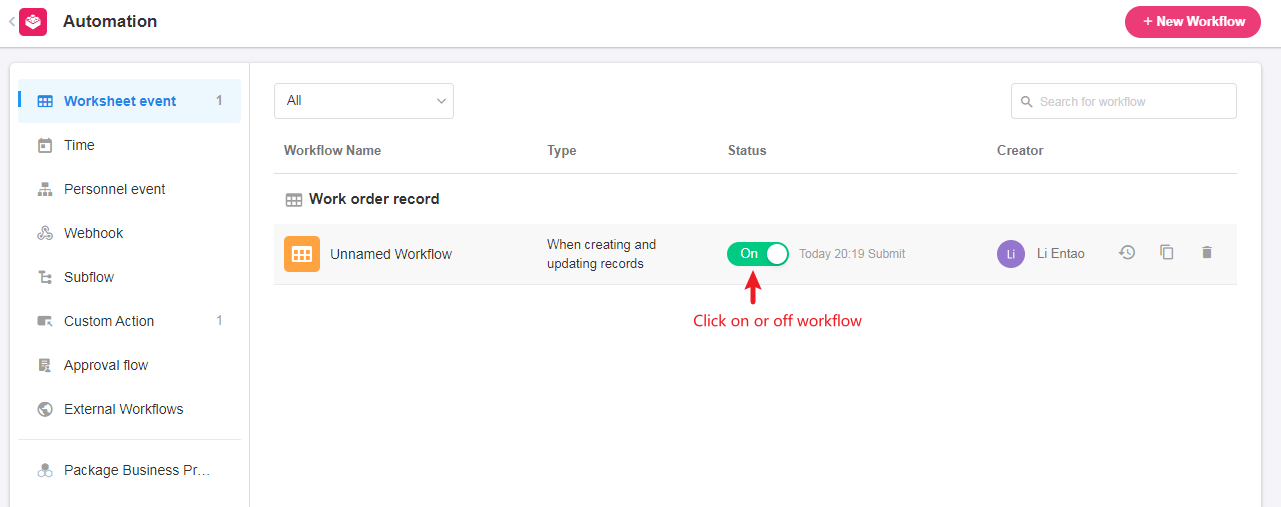
7. Enable/Disable Workflow
Only when the workflow is enabled can it run automatically.
Have questions about this article? Send us feedback