Import Data from Excel
After designing the worksheet, you can import the data.
When importing the data, you can:
- Update existing records
- Associate records in other worksheets
Ⅰ. How to import
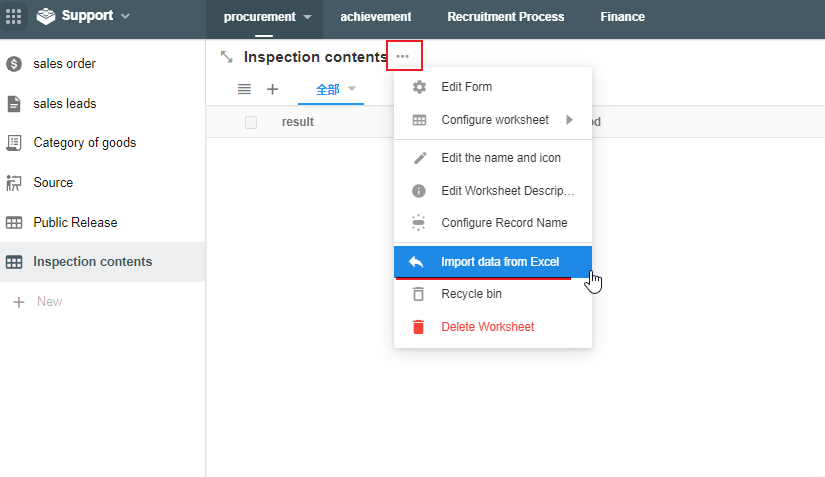
1. Entrance
In a worksheet, click […] > [Import from data Excel]
2. Select File
You can drag and drop files to the area, or select the file to upload.
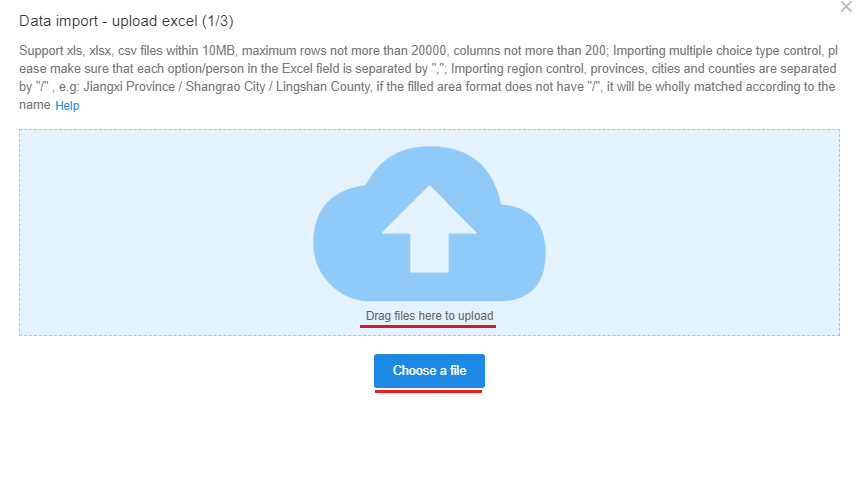
- You can upload files in xls or xlsx format, no more than 10MB, up to 20,000 rows, and 200 columns.
- You can import fields with multiple options such as choices, department, members, etc. Before importing, make sure that the options are separated by English commas in Excel.
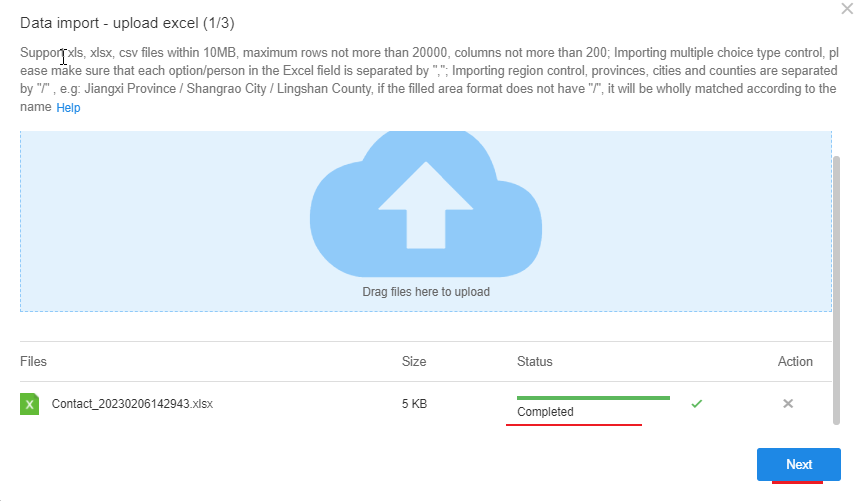
3. Upload File
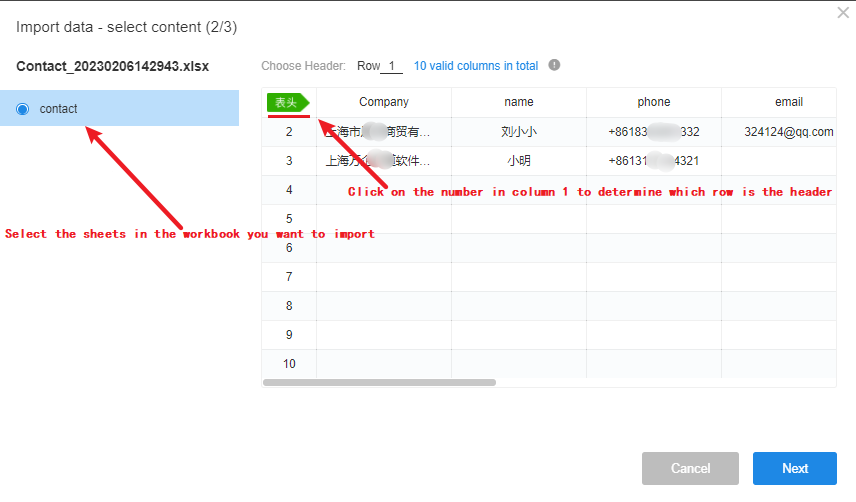
4. Select Header
The header corresponds to the name of the field (column in Excel). Once selected, the data below the header will be imported into the worksheet (the header will not be imported). The header cannot be empty, or the import will fail.
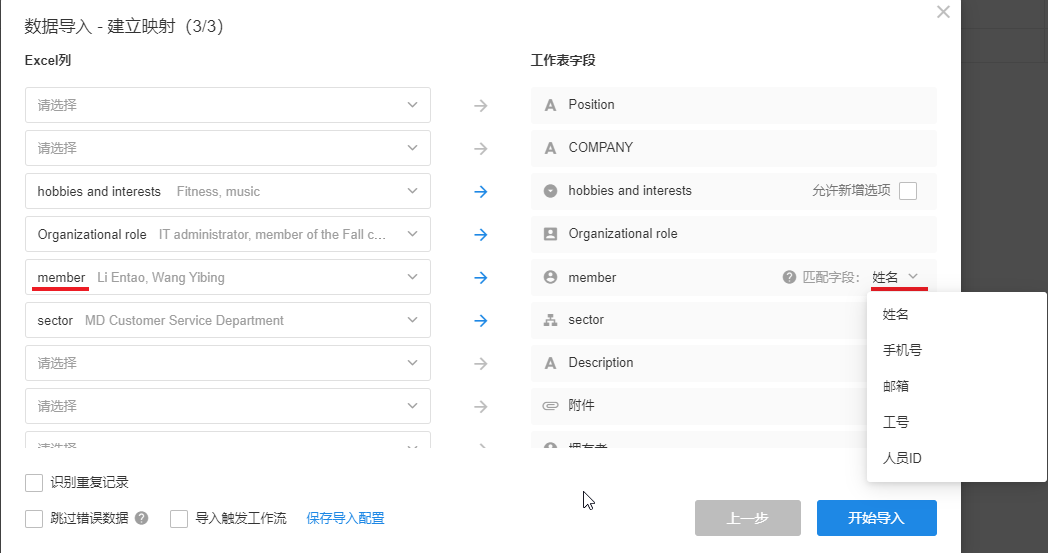
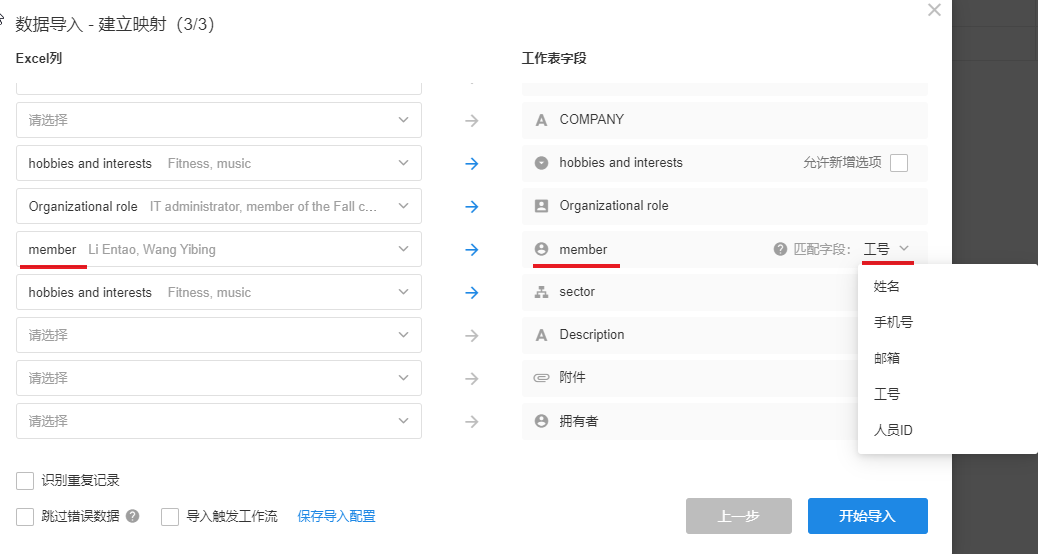
5. Mapping
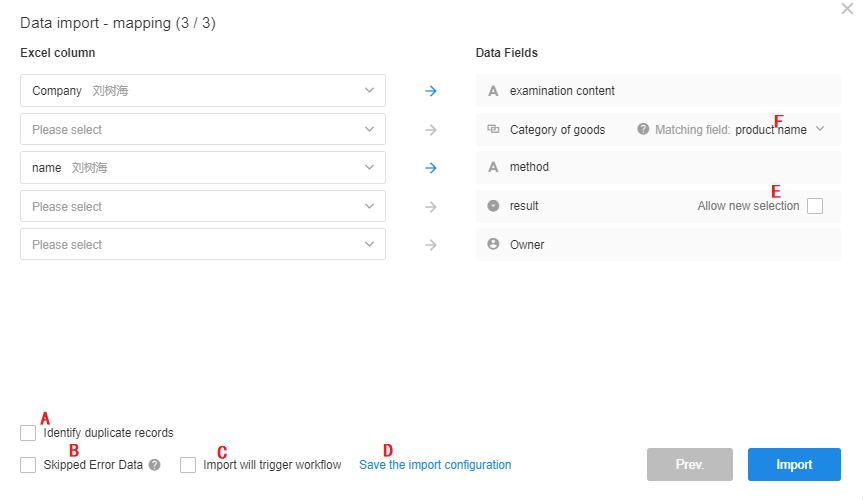
The left side is the column in Excel, and the right side is the field of the worksheet. You should match the columns with the fields (if the column title is the same as the field name, they will be matched automatically; if not, you can select other fields.).
If you don’t match columns and fields, click [Import] directly, the data in Excel will be imported as new records.
Tip:
If the column remains as [Please select], the data will not be imported to its corresponding field.
6. Importing
6.1 Identify duplicate records
If checked, before importing data, it will identify whether this record already exists in the worksheet based on the [Matching field] you select. If it already exists, you need to choose whether to update the existing record, or skip it.
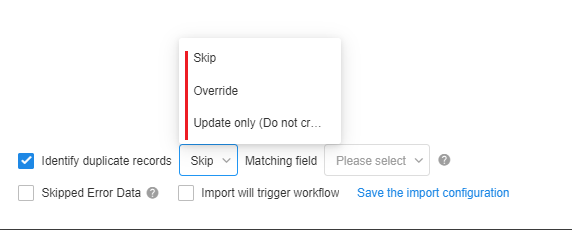
Skip: According to the [Matching field] you choose, if the record already exists in the worksheet, skip it; if not, import it as a new record.
Override: It is to overwrite the data in the worksheet with data from Excel. If the record already exists in the worksheet, update it; if not, import it as a new record.
Update only (Do not create new): When importing, only update the existing records. Even if some data in Excel does not exist in the worksheet, it is not imported as new records.
6.2 Skip error data
When importing, if a field is not in the correct format, or if the import of a required field is empty, then the field is considered error data.
- If [Skip error data] is checked, if there is error data, the data in this row will be skipped and not imported.
- If it is unchecked, the fields with error data are imported with null values and other fields are imported normally.
About error data:
If there is following error in the data, the data in that row will not be imported.
For example, if you check [Email],
If the mailbox is not in the correct format, the whole row will not be imported.
If there is other error data, the fields with error data are imported with null values and other fields are imported normally.

6.3 Trigger workflows
For workflows that are triggered when adding or updating records, sometimes they only need to be triggered when adding or updating a single record and do not need to be triggered when bulk importing data. In this case, you can leave [Import will trigger workflow] unchecked.
Tip:
If [Import will trigger workflow] is checked, for a workflow that is triggered by the date field, if the selected date field is the creation time, the workflow will never be triggered.
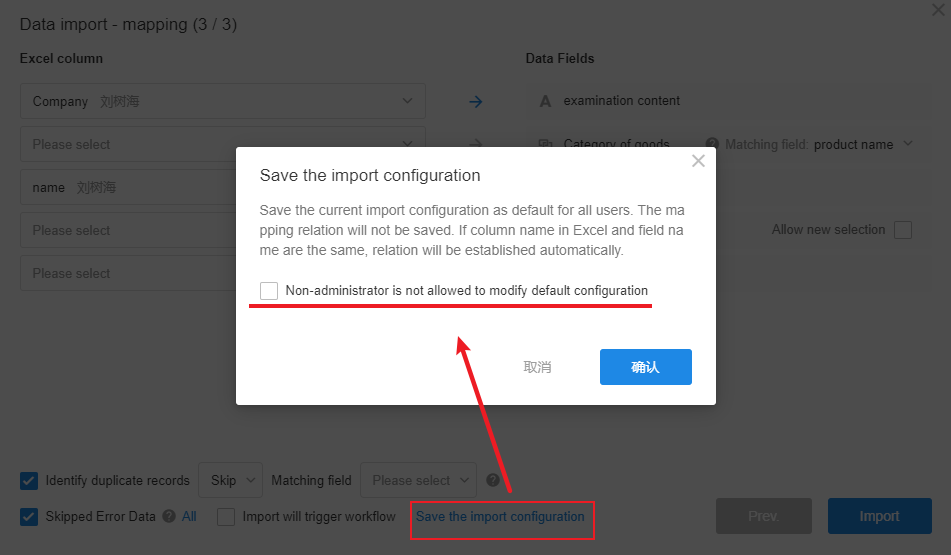
6.4 Save the importing configuration
You can save the configuration of the previous 4 steps as the default configuration the next time you import data.
If [Non-administrator is not allowed to modify default configuration] is checked, ordinary members cannot modify the configuration, they can only import based on the saved configuration and will not see the configuration items.
6.5 Associate records
When importing, you can associate the data with records in other worksheets.
For example, when you import the sheet Contact, there is a field [Company], and if this field is already in the sheet Customer Company, you can associate them.
How to associate records when importing data
7. After Importing
If succeed
There will be the following prompt and message.

If fail
If any data is not imported successfully, there will also be a prompt. You can also download the report in text format.
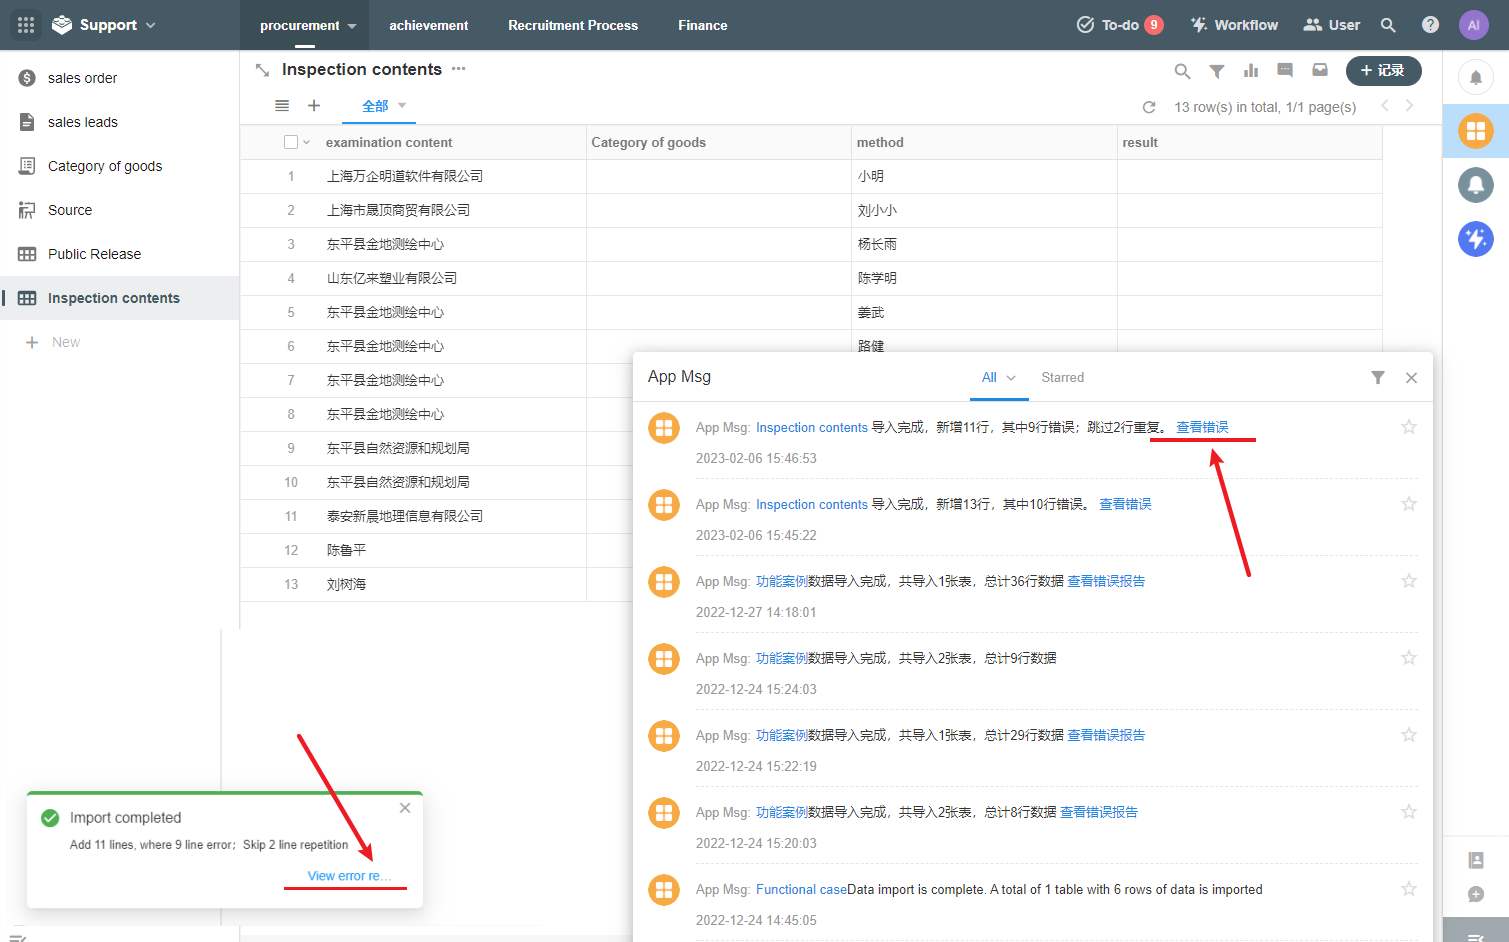
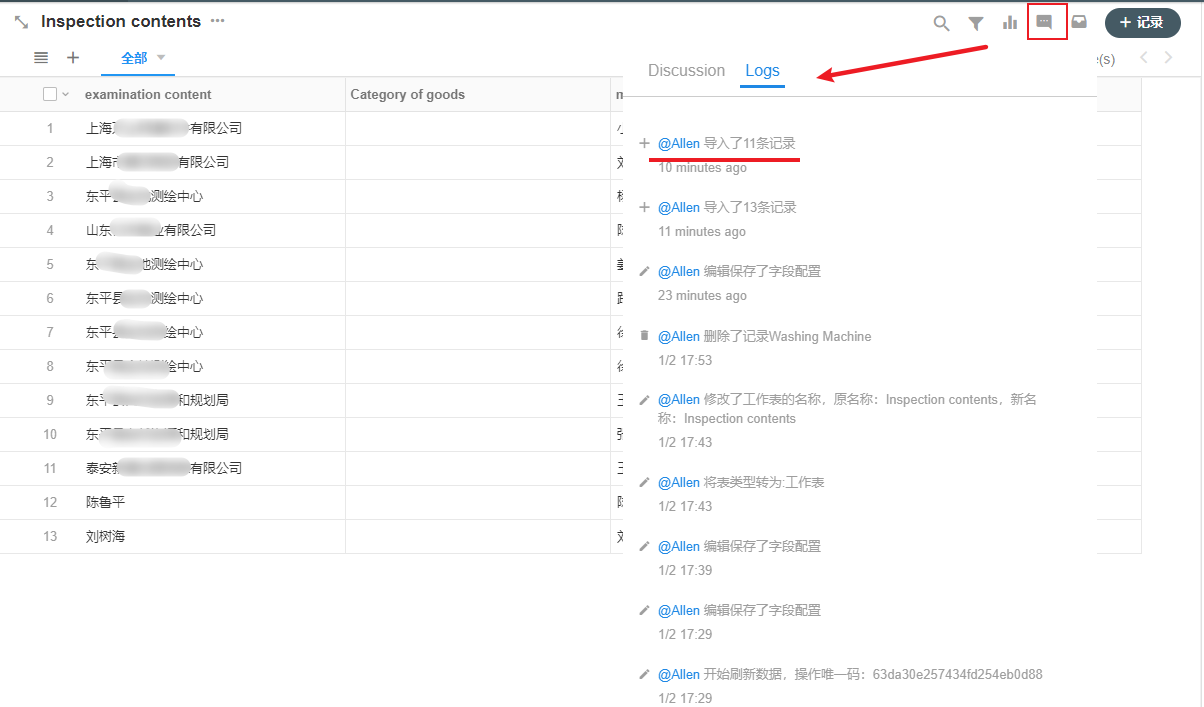
Importing logs
The number of imported records mentioned in the message is the sum of the number of new records and the number of updated records. You can view details in importing logs.
Ⅱ. Rules for Importing Data
1. Fields that cannot be imported data
Sub-form, formula, uppercase, positioning, foreign, rollup, signature, barcode, line, and remarks.
None of the above fields can be imported into the data.
Filed with the properties of [Hide], [Hide when create] and [Read-only].
For fields with these properties, only APP Admin can import the data.
Fields that are not visible when adding records because of role permissions.
For such fields, only APP Admin can import the data.
2. When importing data, the default value originally set for the field is not available
You can set the default values directly in Excel and then import.
3. For imported files
- No more than 10MB.
- In xls, xlsx, or csv format.
- Up to 20,000 rows, 200 columns.
4. For fields such as choices, department, members, o-role
You can import multiple options for such fields. Before importing, make sure that the options are separated by English commas in Excel.
In Excel:

In Worksheet:

5. Import data for the field [Members]
Fields that can be matched with [Members] It includes name, phone, email, job number, member ID.
The above four are the system fields of the contacts, so the corresponding accounts can be identified based on them.
If there are members with same names
If it is a multi-selection, all the members will be imported.
If it is a single selection, they will not be imported.
It is suggested to add a suffix for the account name to distinguish them, and also to facilitate future collaboration.
Or import the members without duplicate names first, and import the rest separately. When importing, you can choose to import phone number, email, job number, or member ID, and choose the corresponding field for the matching field.
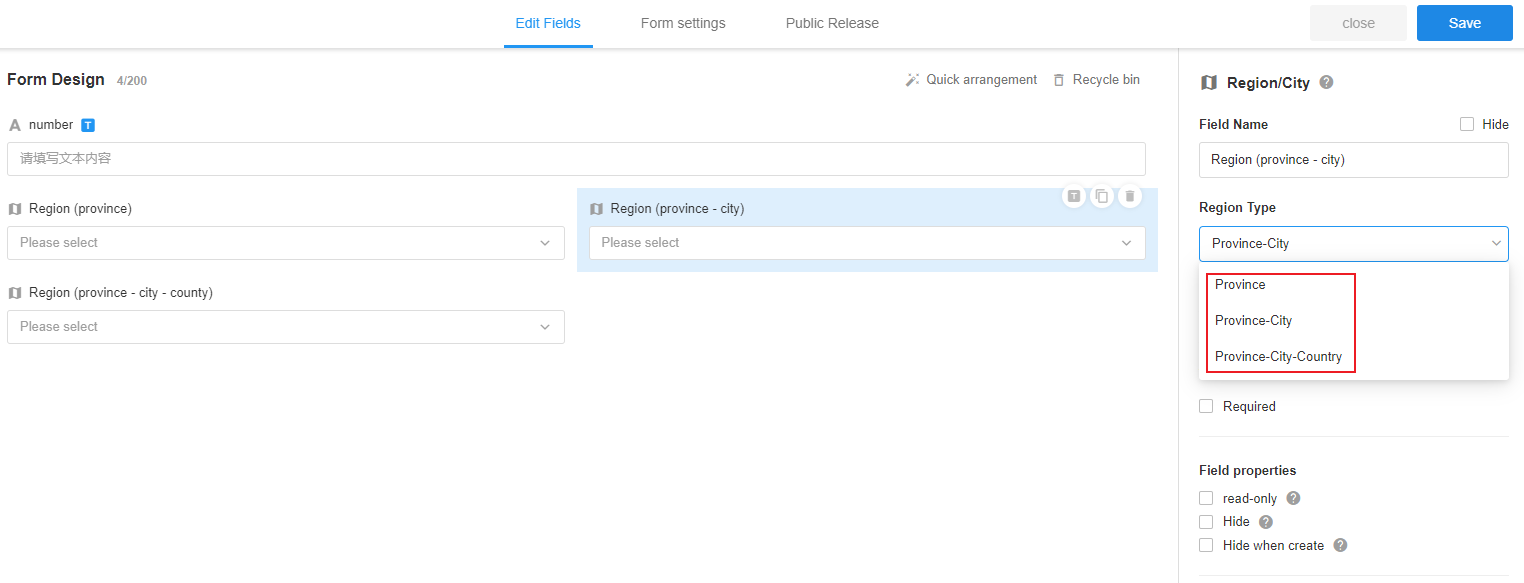
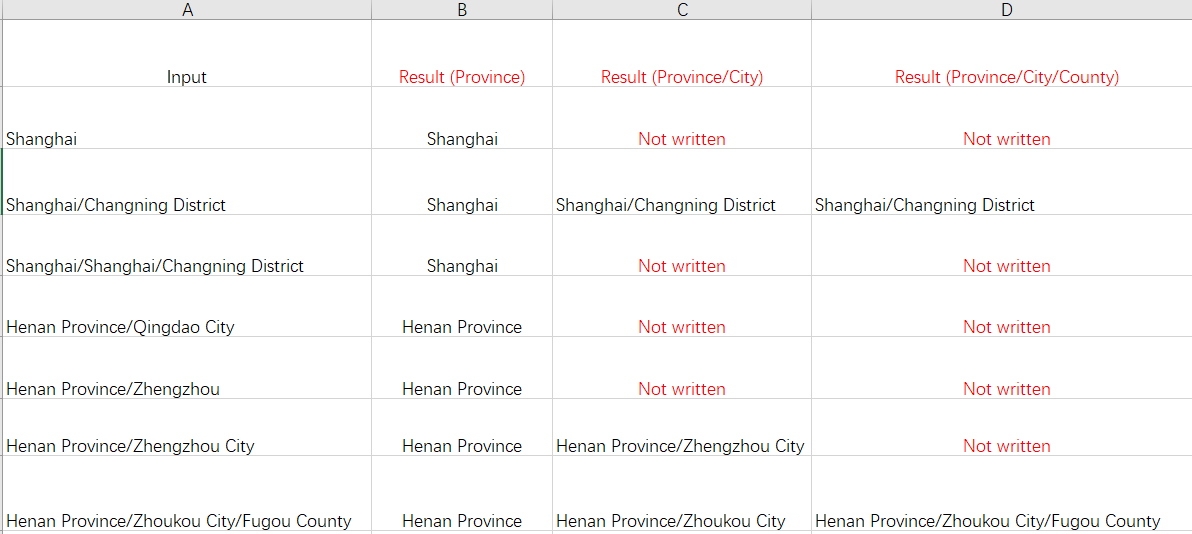
6. Import data for the field [Region/City]
When importing a region field, in Excel, the province, city and county must be separated by /, such as XX Province/XX City/XX County. If there is no /, it will be matched precisely by name.
For example, if you import “Henan Province/Zhengzhou City” and there is no /, it will check if there is a province called “Henan Zhengzhou”, so it will not be imported.
Importing Rules:
First look at the region type of the field, and then import if it matches.
Provinces, cities and counties must correspond to each other. For example, if it is Henan Province/Qingdao City, the city will not be imported as Qingdao City because Qingdao City belongs to Shandong Province.
It must be written in full, like XXX Province/XX City/XX County. If it is written as Henan/Zhengzhou, it will not be imported.
For the four municipalities directly under the central government, it is written as XXX City / XX District.
7. Import files/images
How to export/import files and images
8. Format of Excel files
- It is recommended to keep only the fields to be imported in Excel.
- The first row is as far as possible the column title (field name), starting with the second row is the data to be imported.

Have questions about this article? Send us feedback