Node - Fill in
Function:
In a business process, if you need some information from a member to advance the process, you can add a [fill in] node. When a member fills in a record, you can set permissions for the fields (hidden, optional, required, read-only).
You can also set a time limit for filling in, and those that are not filled in by then can be automatically submitted or a notification message sent to the member.
Scenario:
When new feedback is submitted, notify the customer service staff to assign the technical leader to follow up.
First create a workflow that is triggered by the worksheet event, select [only when creating records], and add a [fill in] node.
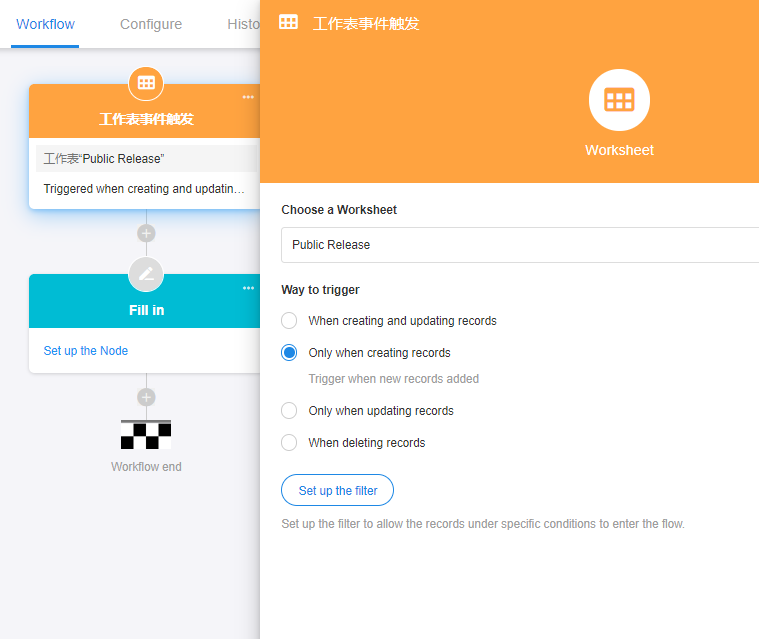
Basic Configuration
1. Set the node name
Please name the node properly according to the function of it, because the node name will be in the notification message.
2. Select the data object
The new work order that triggered the workflow.
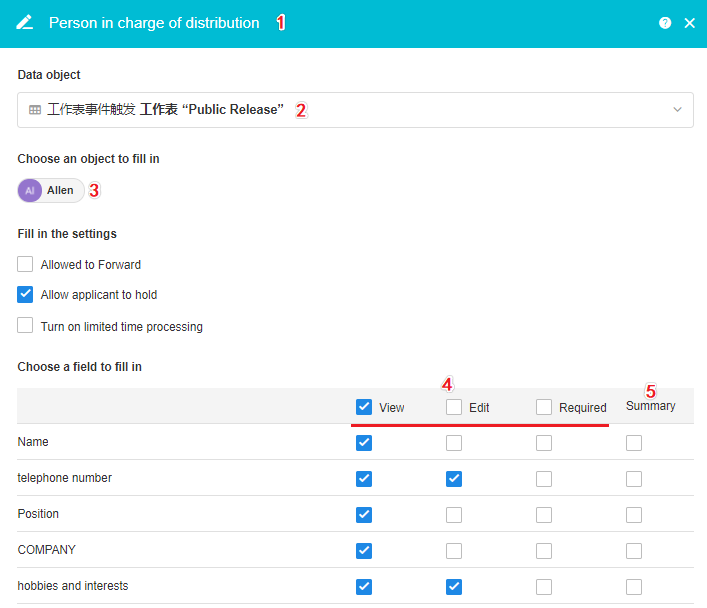
3. Add members to fill in
You can select fixed members from the Contacts, or you can select a role in the department, position, or application.
If there are more than one member in a role in a department, position, or application, everyone will be notified to fill in, and the first person will prevail when filling in, and others can no longer operate.
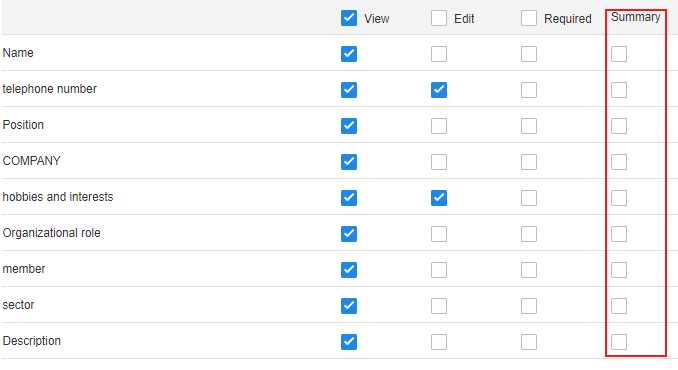
4. Set fields that are visible or editable to the person filling them
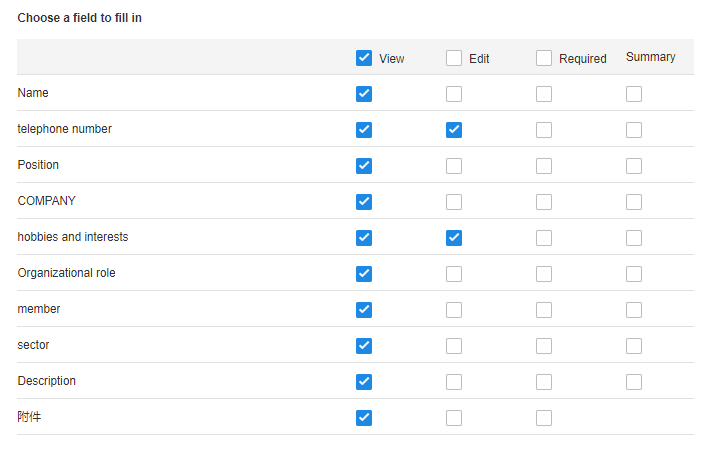
When there is a new work order, customer service personnel need to designate technical personnel to follow up. So, we set the follow up field to be required and set other fields as needed.
The fields to be filled here are the fields of the record selected in the previous [Data object]. They are sorted in the order in the form and are all read-only by default.
- You can modify the field permissions (hide, edit, required, read-only).
If the field to be filled already has content, the content will be displayed and the content filled by the user will overwrite the existing content.
5. Set the summary field
The summary fields set here are displayed in the pending list in [My Workflow] for a quick preview.
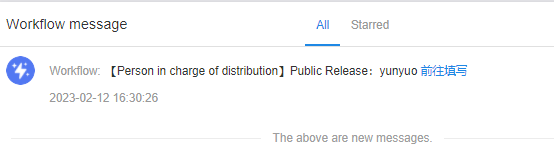
Effect
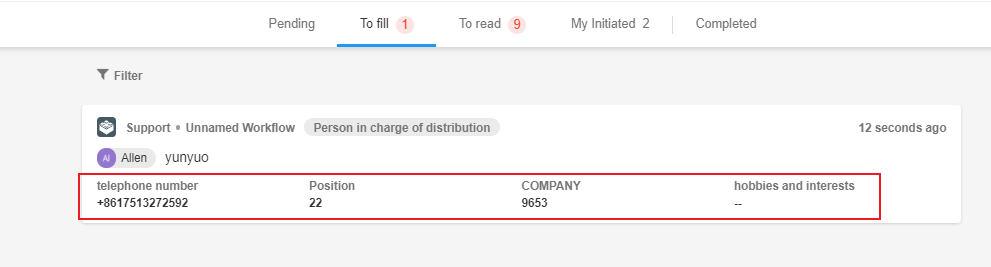
Fill in
The following figure shows the operation of the filler.

Note
Filler must open the record through the notification message or in the [To-do] to edit and submit the record. Only in this way, it can be considered a valid filling-in, otherwise it will not continue to execute the later nodes. To open the record directly in the worksheet and fill in is invalid.
The filler is not restricted by the role permissions in the application, and the fill in node gives the filler additional permission to view and edit the record.
Further Configuration

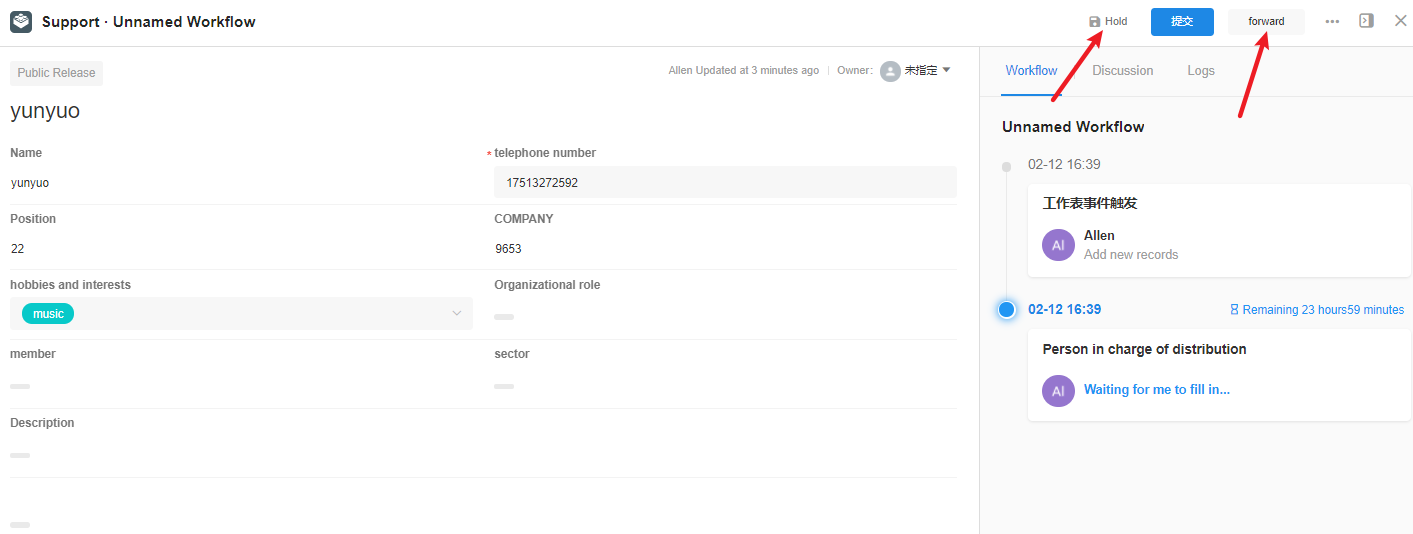
Forward and Hold
[Allowed to forward] If checked, the filler can delegate someone to fill in.
[Allow applicant to hold] If checked, the filler can first edit the field content and save, but may not submit. The process does not continue.
Button position:
If [Allowed to forward] or [Allow applicant to hold] is checked, it is only available in the newly triggered workflow and will not be displayed in the filling in process that has been triggered before it is checked.
Customize the button
The default button is [Submit]. You can modify it according to the actual business scenario.

Turn on limited time processing
You can set a deadline for the filler of the current node, and you can set 1 or more reminders before this deadline, or you can set an automatic submission after a timeout period.
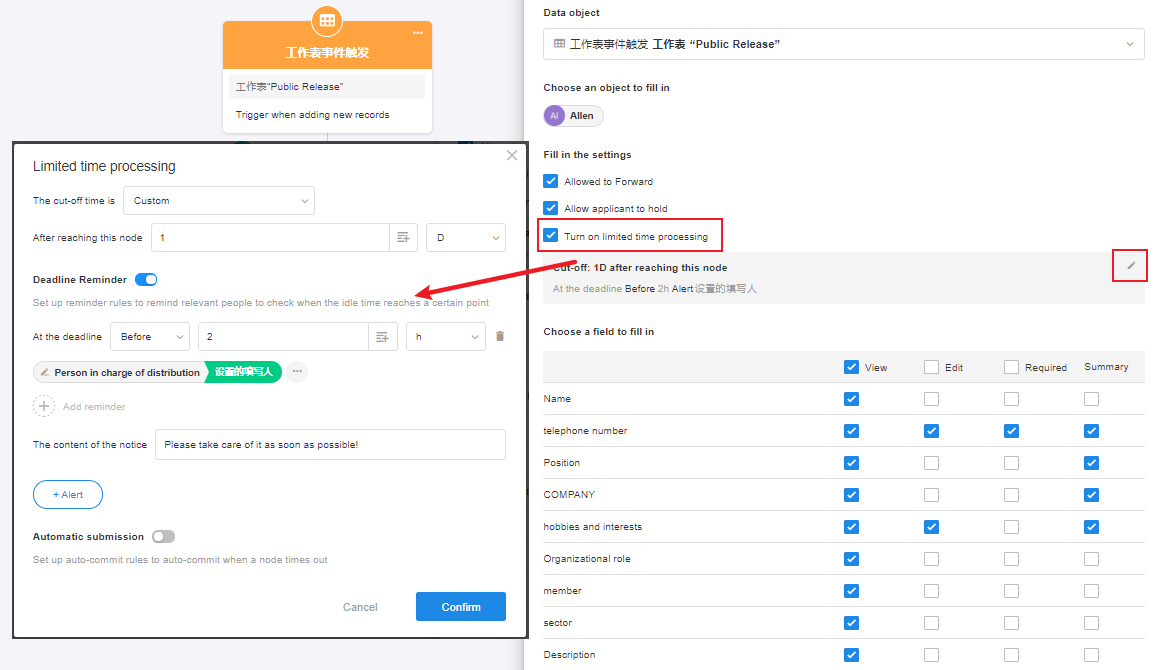
1) Set the deadline
If it is not approved later than the deadline, it will be marked as timeout. Deadlines can be set in two ways.
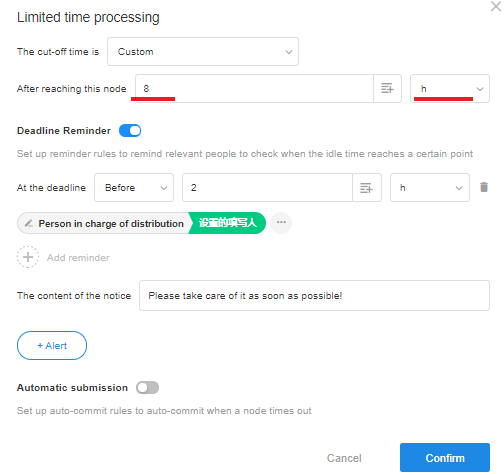
Custom
From to this node, if the field has not been filled after X days (hours or minutes), it is a timeout. The figure below indicates that the normal processing time for the current filler is 8 hours, and more than 8 hours is considered a timeout.
Specified date and time
You can set a deadline based on a date field or set a fixed time. As shown in the figure below, it is a deadline based on a field in the worksheet.

If you select a date field, you need to set the time manually.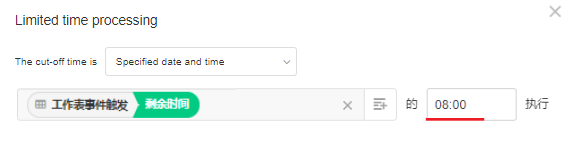
2) Set the reminder
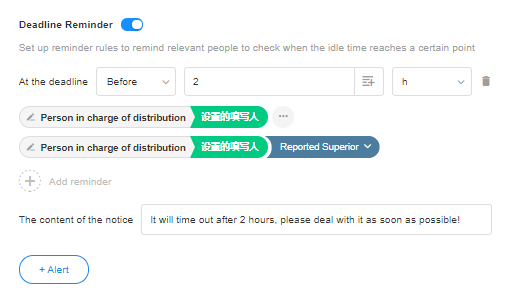
When the deadline is approaching, if it has not been submitted, you can set to automatically remind the filler. In addition to the filler, you can also add other people to supervise and approve, such as the filler’s supervisor.
As shown in the figure below, the filler and his supervisor are reminded 2 hours before the deadline.
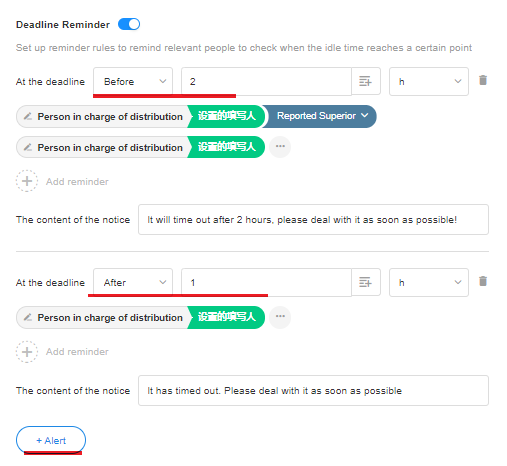
If you need to notify the filler both before and after the deadline, you can set multiple sets of reminders. As shown below, reminders will be sent 2 hours before and 1 hour after the deadline.
3) Automatic submission
If the deadline is passed it can automatically be submitted. You can set it to be automatically submitted at the deadline, or it can be automatically submitted X hours after the deadline.

Difference between the set filler and the actual executor
The node after the [Fill in] node may use the filler. You will be asked to choose between the set filler or the actual executor.
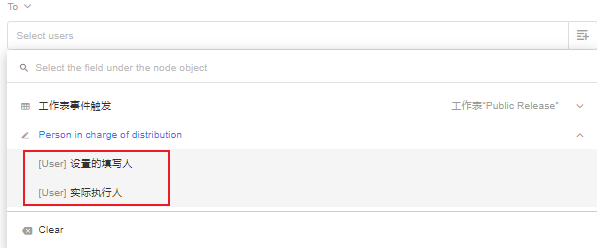
Generally, the filler and the executor are the same person. But when the filler delegates someone else to fill in, the delegated person is the actual executor.
If you select members from a position to fill in the [Fill in] node, and there are more than one member under the position, the “filler” refers to more than one person, and the actual executor is the first one to operate.
Have questions about this article? Send us feedback