Node - Get links
Function: With this node you can get a link to the record. By clicking on this link, you can view or modify the specified fields without logging in.
Scenario
1). The salary information of all employees is recorded in the Salary worksheet. On the payday, after the payroll is issued, the HR can send the link of the corresponding record to the employee, and the employee can click the link to view the payroll details, but cannot modify.
2). The problems submitted by customers are recorded in the Work Order worksheet. When the problem is finished, the link of this record can be sent to the customer by SMS. The customer can open the link to view the details, and also fill in the “Comment” field.
How to set the [Get links] node
Take scenario 2 as an example.
The following figure shows a simple work order record.
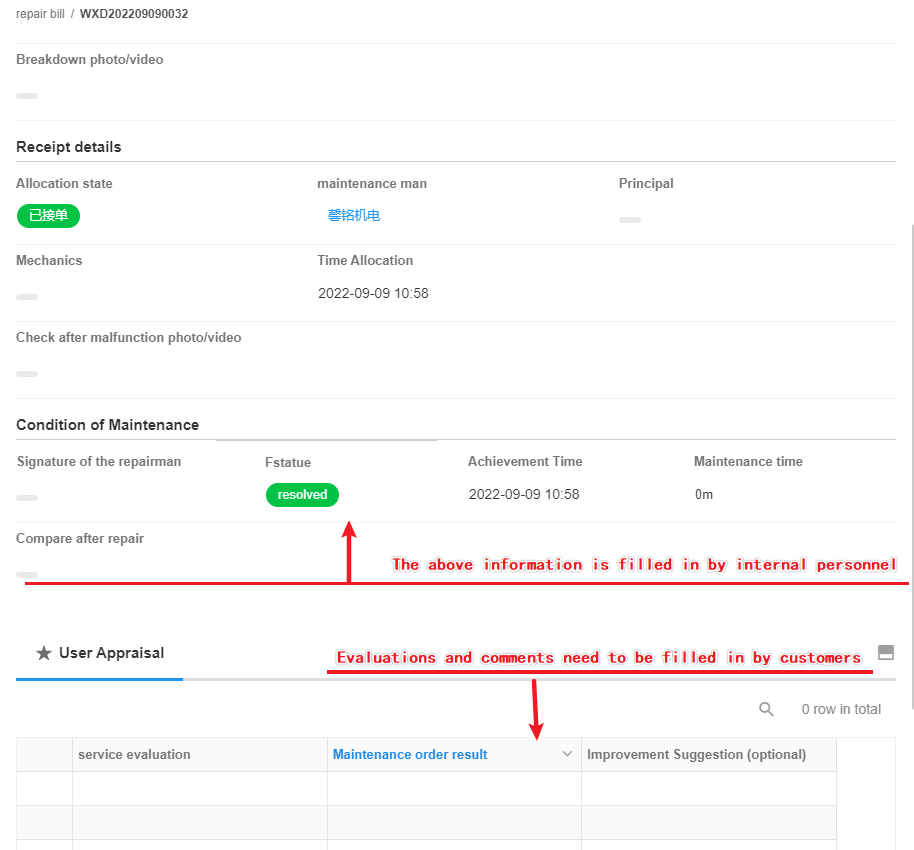
When the status of the work order is marked as [Resolved], a link to the work order is sent to the customer (there is customer’s mailbox and phone number in the record).
Start configuration
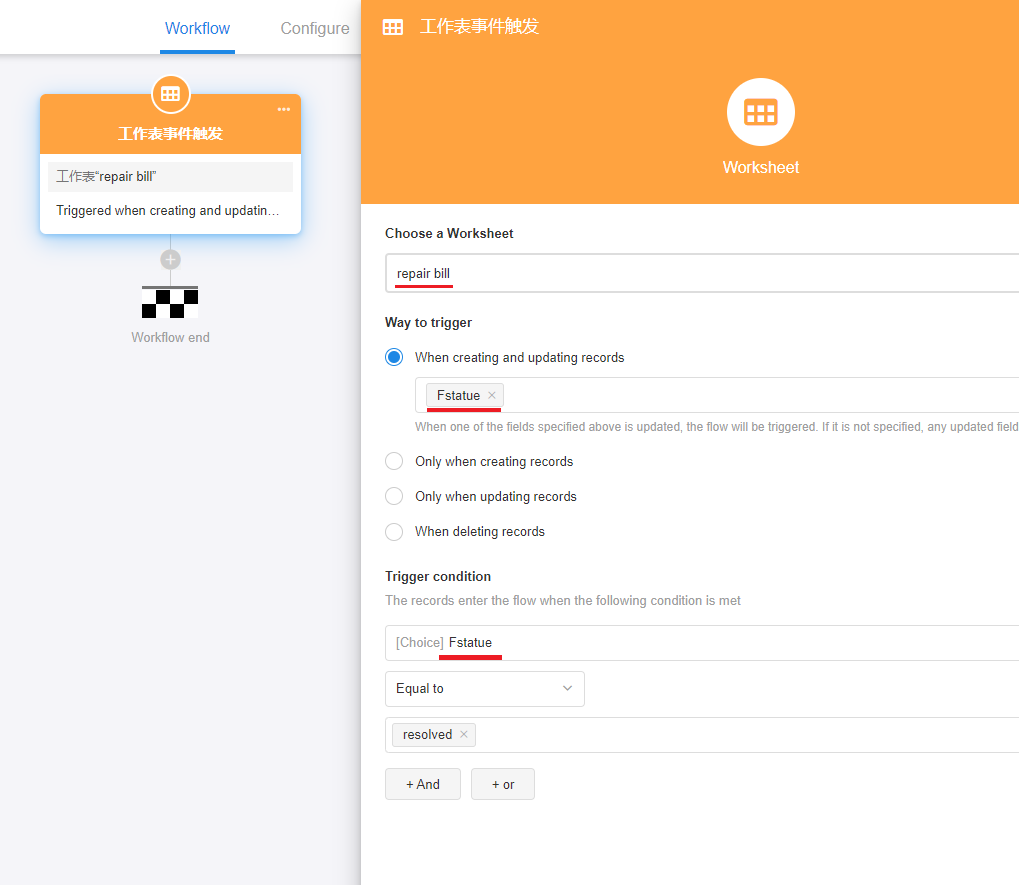
1. Set the trigger node
To create a workflow triggered by event from worksheet, select [When creating and updating records], and set the trigger condition to [Status Equal to Resolved].
2. Add the node – [Get links]
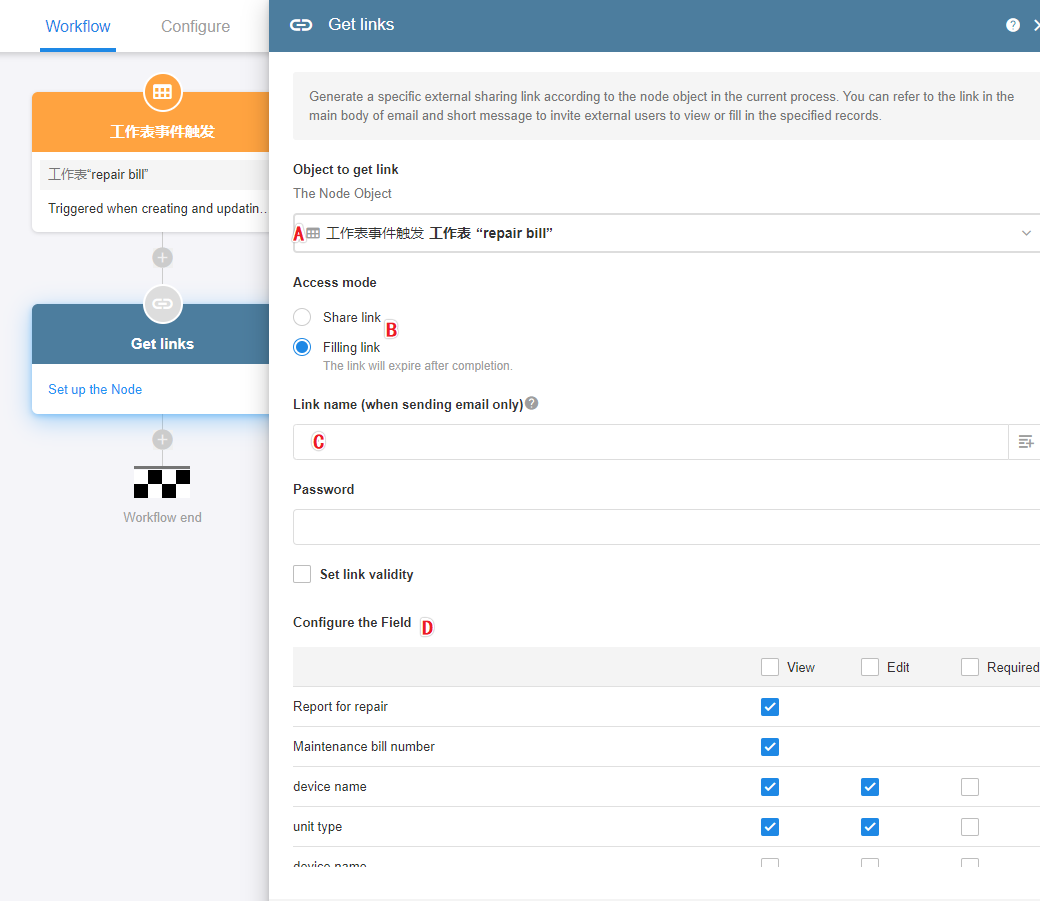
A: Select the record that triggered the workflow.
B: Access mode:
- Share link: If checked, the user can only view the record, and the link will not expire and can be repeatedly opened unless the record is deleted.
- Filling link: If checked, the user can modify the record through this link. The link expires immediately after submission. If the user needs to modify it again, they need to trigger the workflow again to get the link.
C: Link name
If you do not set the link name, it will be displayed as the actual content of the URL; if you set the link name, the name will be displayed and click on the name, it jumps to the page corresponding to the link. This feature is only available in emails. The link is displayed directly in SMS and station notifications.
D: Set the field
You can set which fields are visible to the user, which fields can be filled in, and which fields are required after user opens the link.
If you select [Share link], users can only view the field, not edit. It is shown in the figure below.
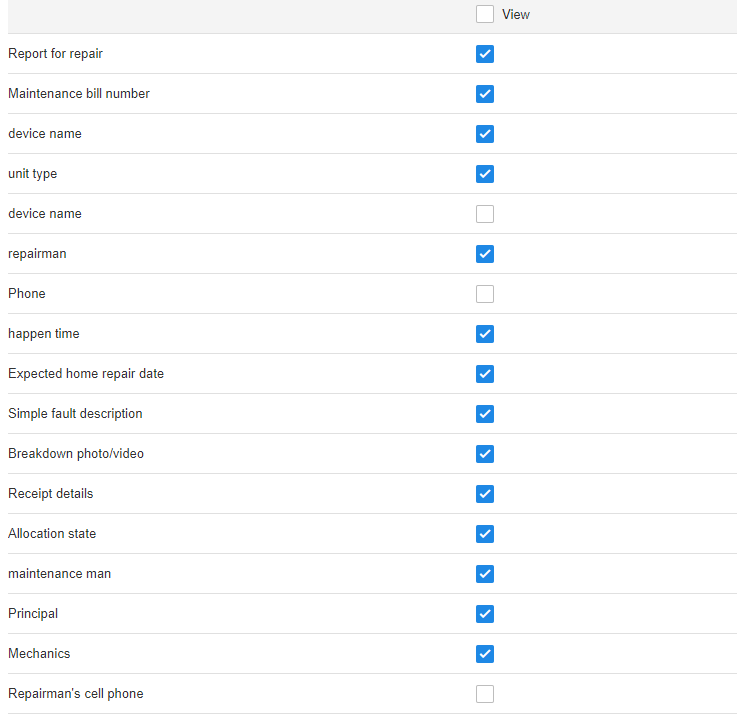
If you select [Filling link], you should to set [View], [Edit] and [Required] for the fields.

3. Use the value of the node
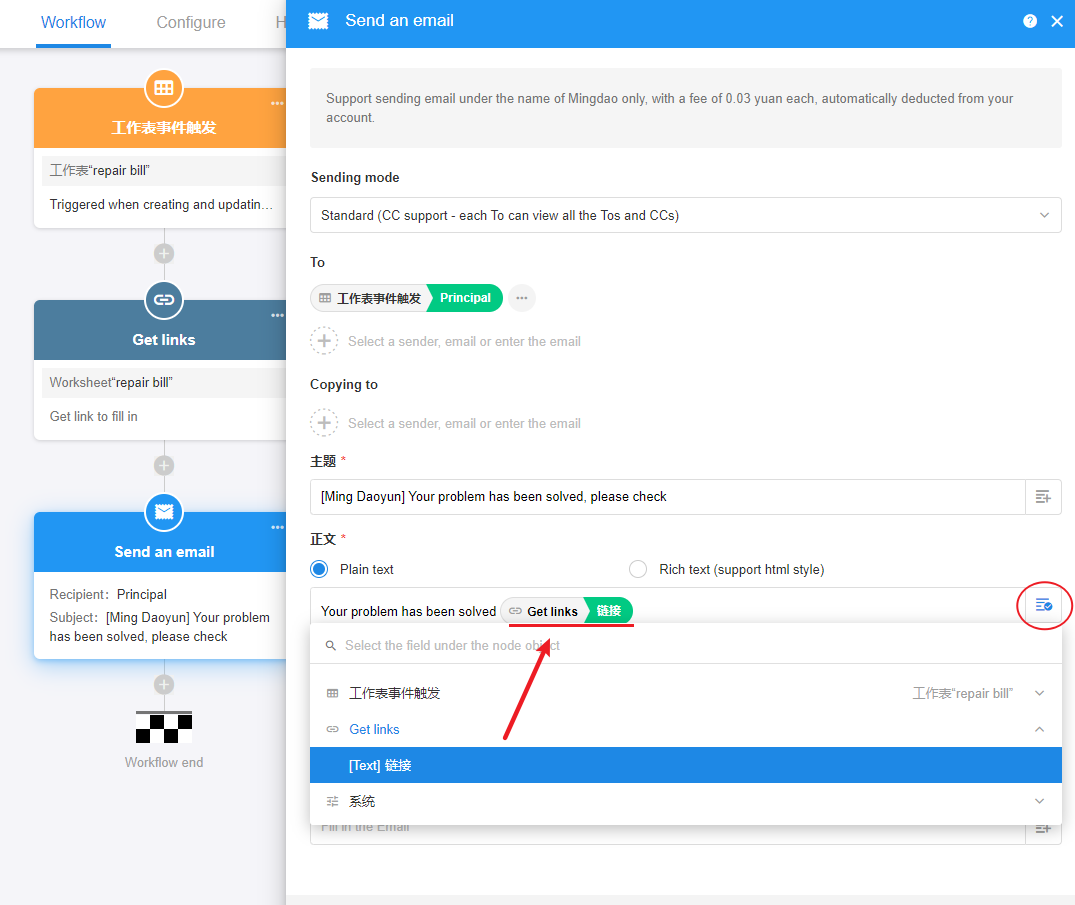
For example, if you send a link to a user by email, SMS, or station notification, you can use the obtained link in these three nodes.
For example, if you want to send an email to a customer, add a [Sending email] node, and select to use the value of the [Get links] node in the body.
Note
When testing a workflow, you can send yourself a station notification first to confirm that it is OK before configuring the workflow according to the actual requirements.
Have questions about this article? Send us feedback